FABUI COLIBRI: the world first OS for 3Dprinting

FABUI COLIBRI is finally ready for its first steps in the world. From today, it’ll be available for dowload. After a first trial period, (the Beta test will last around 40 days) it will then pop up as update for everyone.
Want to try it immediately?
Join the revolution!

All the FABtotum’s owners have got used to what the FABUI has always been: a web interface that linked the machine and the human. A webpage with a dedicated IP address that could guide the multipurpose device to run all the tasks required.
Well, not exactly. Today, after three years of development, the FABteam is ready to introduce you the very first Operating System for 3D printing: FABUI COLIBRI.
A brand new multipurpose tool for a multupurpose device. The FABtotum CORE and FABUI COLIBRI are the perfect match.
Linux derived, will set a new start and a long path that is yet to be created.
FABUI COLIBRI is the result of a long process: feedbacks from the users of the FABUI and a hard work of tests converted in a complete different experience. COLIBRI is built from the ground up for 3D printing thanks to the Team and all the FABtotum’s owners, who will as well be able to update their devices and join the revolution.
What makes FABUI COLIBRI so great?
It’s light, it’s fast, it’s stable. Just like the small animal FABtotum took the name from (colibri is the italian word for hummingbird; some species are called with the same word in english as well), the world’s first Operating System for 3D printing is studied to never leave the user and get him/her a best-ever experience.
Light: it only weights around 150mb and it has everything needed to start working. The file can easily be written on a micro SD (or standard SDs for “older” users) to switch from the FABUI to COLIBRI. Of course, it will be built-in on any new device and it is retro-compatible with all the existing units.
Fast: the first boot takes around 120 seconds, then only around 15 seconds for the next times. The white lights will tell to the user that everything is ready, just as usual. But faster. The FABtotum will be accessible to a standard IP address via Ethernet cable and can be as well connected via Wifi. With both solutions, the webpage will respond immediately to every command, from moving the axis or managing temperatures to uploading the files.
Stable: every Operating System has a recovery method and COLIBRI is developed to never fail. No more loss of files, no more troubles. The first ever OS for 3D printing is able to reboot in a click and fix itself so that the user is never left alone with a crashed system. The FABUI COLIBRI is meant to work continuously. It will as well always automatically update in the background (as long as the device is correctly connected to the net).
Not enough? It also comes with brand new algorithms which will better manage every print; it introduces pauses while printing, it adds a performing virtual visualisation, it has a 3D scanning function performing better than ever. Last but not least, any user will be able to update but also to downgrade both software and firmware should they need to (for instance if they develop a different interface they will always be able to use it no matter what direction FABtotum takes).
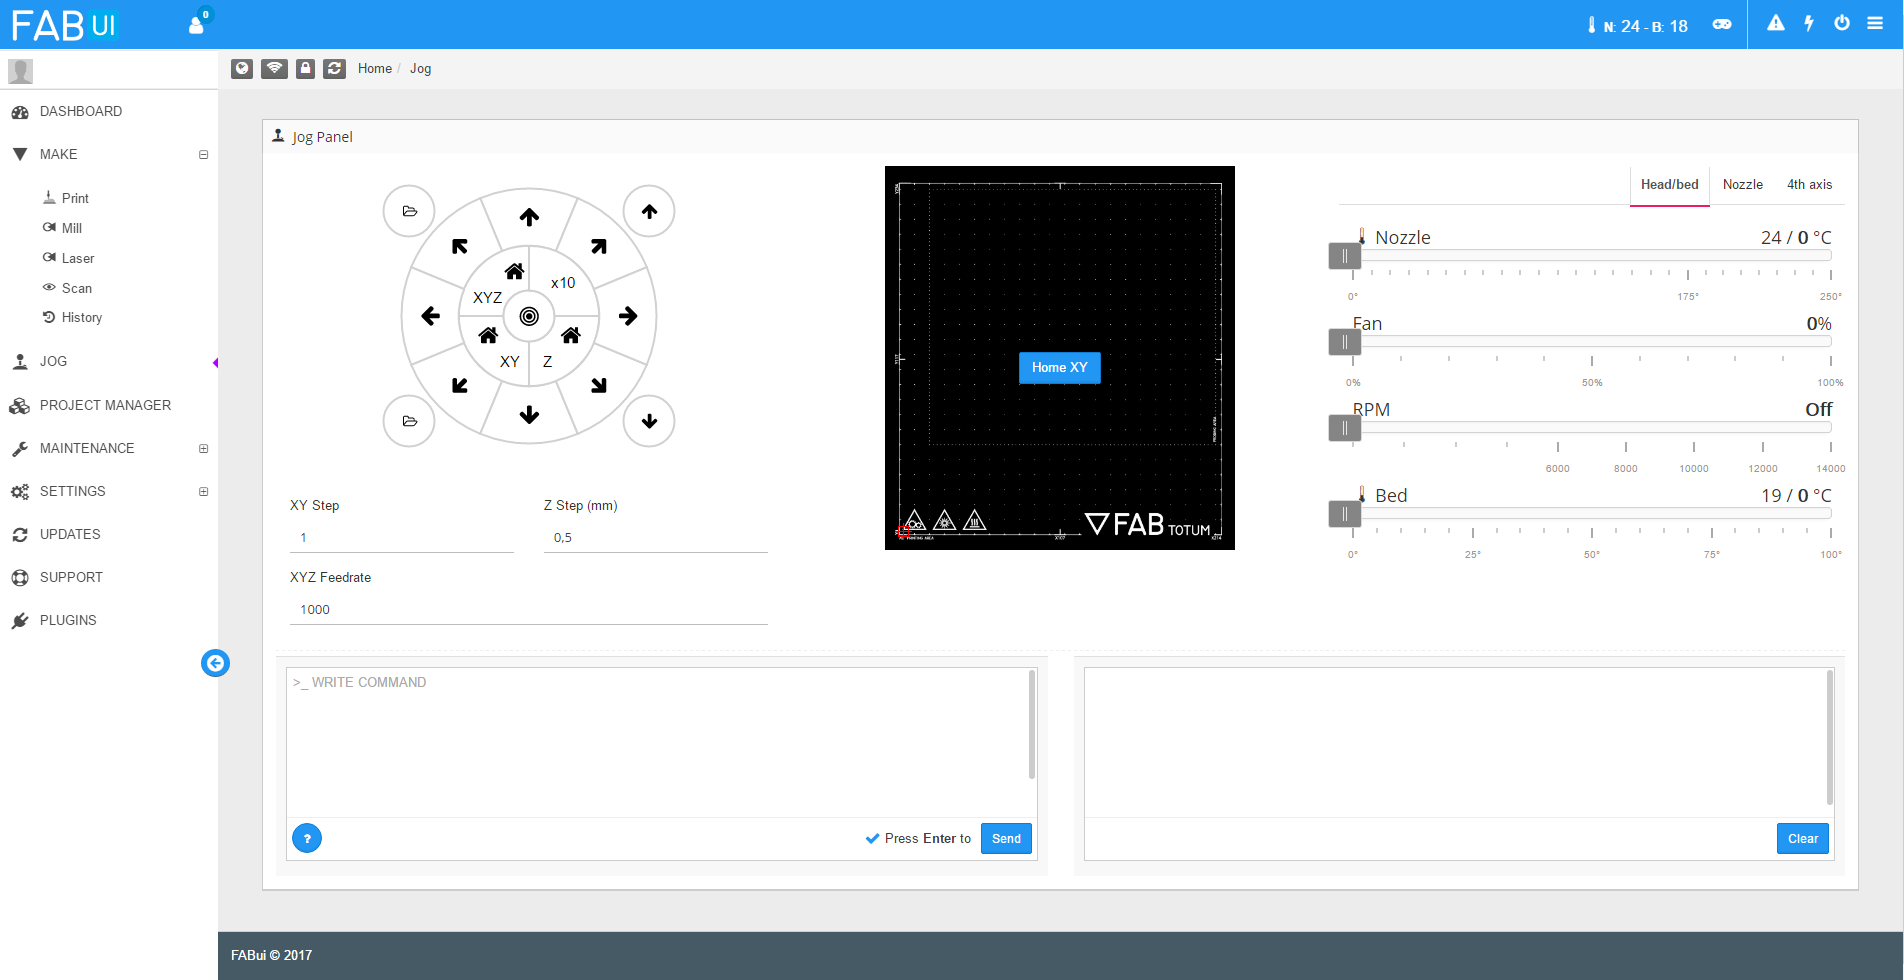
A simple and user friendly look
The FABUI COLIBRI just looks easy to be used. Main features and threads are clearly listed on the left menu. FABtotum’s owners will recognize the same structure laying behind the revisited one. The new skin is clearer and gets the focus on the most important threads.
Dashboard: the place where all the news are shared via our blog and social accounts. Community craetions are as well shown here.
Make: that’s how the tool and function is chosen. That’s where all the projects become live.
Jog: useful both to check the behaviour of the printer and for any special task.
Maintenance: here is where the user should go when it’s time to clean up, and/or to set the right filament.
Settings: need to fine tune your FABtotum? No problem, everything can be checked and calibrated. From the net to the Hybrid Bed.
These are only the main areas of the menu of course. Along with a more friendly interface, there’s another big change: the FABUI COLIBRI features three languages. English, italian, german. What about the others? Ask the community: having a big group of users around the world means that if FABtotum does not make it, someone else can. The Team will then review it and get it available for everyone.
A free spirit
The FABtotum remains an open-source for the greatest of its parts. FABUI COLIBRI has a dedicated area for the custom heads and plug-ins. Since the beginning of the company’s life, community creations have always been welcomed. With the introduction of the Head Development Kit the Team offered a new support hardware side. FABUI COLIBRI adds the chance to easily feature any DIY tool. The users who can develop additional parts will just need to set everything up and get the most out of their creation(s). FABUI COLIBRI adds a simplified tool that will open up to a preset list of plugins, such as the one for the Laser Head recently released, but as well leave space for ideas and suggestions from the world.
Just as for the languages, there are still many sides of the platform that can be enhanced and the Team is more than happy to receive feedbacks from the community.
3, 2, 1, GO!
The FABUI COLIBRI, also known as FABUI 1.0, is ready to be downloaded and tried. After a first round of feedbacks, it will then pop up as update for everyone. As said, it is a major change but will still work on every existing unit.
The FABtotum is a multipurpose device and FABUI COLIBRI is of course intended to work only with it. Every function available today – 3D printing, CNC milling, 3D scanning and Laser engraving – will benefit of improvements.
How to install it on your FABtotum:
FABUI COLIBRI is the first Operating System in the world completely developed for 3D printing. Completely developed by the FABteam, it will make everything fast and simple.
Here below you’ll find the steps to follow to install it on the FABtotum: compatible with every unit, it is built-in for new devices (starting from March 2017).
1. Download the latest image available:
http://update.fabtotum.com/colibri/armhf/images/sdcard_latest.zip
The file will be automatically saved on your computer as a zipped folder. Should your computer not recognize it, give it a try anyway.
2. Format an SD card (any kind/size will do):
make sure to use a FAT32 File System and label it as “Boot”.
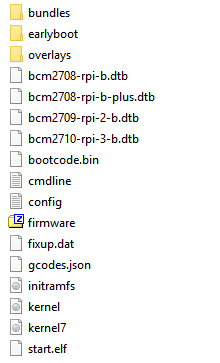
3. Unzip the file you downloaded at step 1 making sure that:
a) the destination you select is the formatted SD;
b) no folder is created. The content of the .zip should be pasted directly in the main directory;
c) once done, you should see three folders (“bundles”, “earlyboot” and “overlays”) plus a series of files;
d) once done, you should see that the files just weight around 150mb.
4. Insert the SD into the slot of the FABtotum:
a) when you do this, of course, the unit must be turned off;
b) if it’s the first time you open the electronic panel, make sure to firstly take the screw off from the bottom right. The remaining three points are magnets. This is valid for unit delivered until Jan 2017. Newer units will have screws on all the 4 points.
5. Connect to your FABtotum via Ethernet cable just as you did on the very first time.
6. Turn on your FABtotum:
you should hear a couple of “beeps” and lights will start blinking. They should stop in a minute more or less. If this does not happen, files might not be correctly copied on the SD. First, try to repeat operations. If this still does not solve, contact us via ticket system.
7. Get the blue lights:
when FABUI COLIBRI is ready to start its booting, leds will turn to a stable, electric blue.
8. Open your preferred browser and go to page 169.254.1.2:
a) first boot will take up to 1 minute: you’ll just need to follow the instructions on the screen and wait for all the files to correctly upload.
b) second setup will need you to fill in your details: register again with your email and password. Please avoid using the autofill provided by some browsers at this step. All the lines must be filled and have a white background;
c) make sure to use a valid email;
d) as for the languages, feel free to select your preferred one. Some pages are still available only in english for the very first release. Updates will later translate everything.
9. Follow the wizard:
FABUI COLIBRI will guide you step-by-step through the next steps. Make sure as well to recalibrate your FABtotum, reconnect to the net and simply run all the tasks just as you did when you received the unit.
Nice, now that COLIBRI is on your FABtotum, feel free to share with us your feedbacks and advices. But! Please use the below link so that the messages go straight to the Dev Team.
No ticket needed, no forum post, just here:
https://github.com/FABtotum/fabui-colibri/issues
We once again thank every person who helped us, even just using his/hers FABtotum.
Keep following us,
FABteam

