FABtotum and Palette+, Soluble supports and Multimaterial printing
Getting started
In order to use Palette+ with FABtotum Personal Fabricator we suggest to follow these steps.

- Download the Palette+ Bowden tube adapter for FABtotum Printing Head PRO and print it. Once you have it printed, insert it over the pushfit lock of the Printing Head PRO, then fix it with M3x10mm bolt and M3 nut. Don’t tighten it too much, it should be just fine.
- After calibration you want to print, finally! Check here to download the multicolor models or here to convert the existing model into a multicolor one. Upload the models to Cura, select “Dual extrusion merge” by clicking each model. We advise you to set up at least 3 lines of skirt, to prevent the oozing lost. The procedure afterwards is pretty much same as for calibration. Preheat the Printing Head Pro, take out the teflon tube from the adapter clip, start multicolor splicing, hold the magnet until the filament exits the teflon tube, load it to Printing Head PRO, insert the teflon tube. This time you should check Palette+ display, that shows you the amount of filament to extrude. Use Jog to do it, trying to get as close to 0mm as possible. Do not extrude the exact amount of material written there, instead try to go slowly the last 5mm to be precise. This affects the perfection of the first layers. When achieved 0mm, use Palette+ dial to confirm loading filament. Start print normally.
- In case you want to use Palette+ to print multicolor model with soluble material as support, read the paragraph below to slice it properly.
- After each printing we suggest you to unload the filaments from Palette+ using Utilities-Unload materials option in its display.
- You may want to optimize your calibration by following this article. Note that you have to write down the Ping values during the print ongoing.
Mosaic Manufacturing has prepared a very informative article on Palette+ first steps setup. We would advise some comments on how to apply this generic setup to FABtotum Personal Fabricator:
- Position the Scroll Wheel with Velcro square on the left side, near the top/center.
- Instead of the provided clip for direct drive extruder you want to use the adapter that you’ve printed and installed over the Printing Head PRO. Insert the Palette+ teflon tube in the adapter. Make sure it does not move out by itself.
- We suggest to use the latest calibration model that is provided by Chroma when you start its Calibration guide (instead of the Calibration Cube offered to download from the website). Use Cura 15.04.6 to slice the model (here is the Cura profile for using Palette+). Save the gcode and load it to Chroma. Select the filament type and the color, then click Save for Printer. You are going to have the file to copy to Palette+ SD card, and the modified gcode file to upload to Project manager in FABUI. After that, preheat the Printing Head to 200°C, take out Palette+ teflon tube from the adapter clip, start the multicolor splicing, then hold the magnet so that the material goes on in the teflon tube. Once it exits the tube, release the magnet (Palette+ should stop generating material and wait for you to load material in the Printing Head), pull gently about 12 cm of the filament from the tube (Palette+ will generate some material, try not to pull too much), insert the filament in the Printing Head PRO using the lever on the back of it. Then release the lever, insert the Palette+ teflon tube in the adapter clip and use Jog in FABUI to extrude material until you see the change in color, as described in Chroma. Try to extrude small quantities of 1 mm per time so that you achieve maximum precision of the calibration. Honestly, it requires some patience. Once you see the extruded filament to change color, stop extruding, follow the instructions in Chroma and Palette+ screen. After the print you obtain two values to insert to Chroma profile. You may want to import the profile that we provide here.
Using PVA soluble supports along with 3 materials
Using Palette+ for 3-material printing with PVA as support requires a little bit of fiddling with cura.
Mosaic Manufacturing offers a very useful device that allows to print using up to 4 different materials, with just one extruder. That provides a great possibility for 1-extruder printers to create not only multicolor objects, but also to use water-soluble material as support for the overhangs and bridges. After the printing such object is being post processed with water so that the supports are gone and the pure model remains in perfect shape.
However here is a problem that can arise during the print of a 3-color model with the 4th material as support.
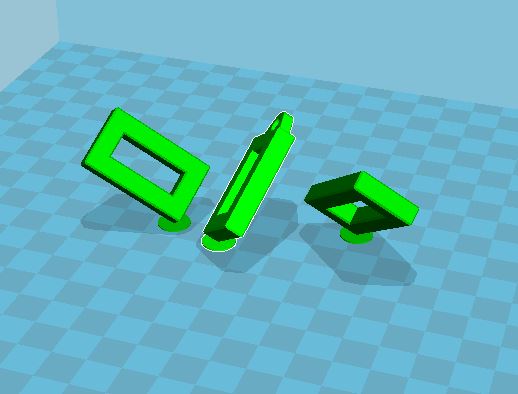
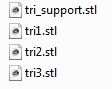
After configuration of Cura according to manual (that is very informative, in fact), we can load a multi-color model that consists of 3 different models:
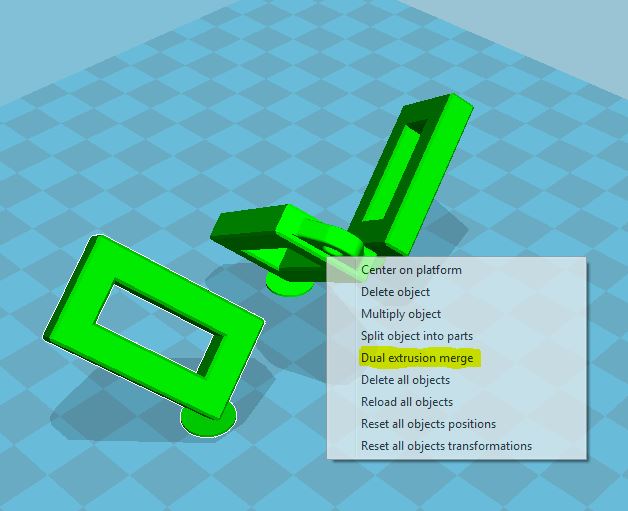
In Cura 15.04.6 we should select each model and choose “Dual extrusion merge”, which makes Cura set a different extruder for each model, keeping them together though
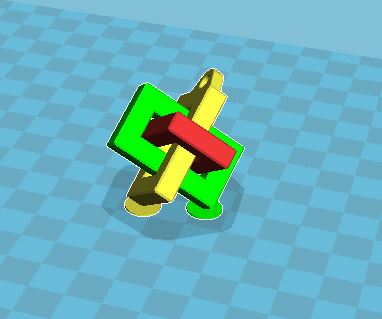
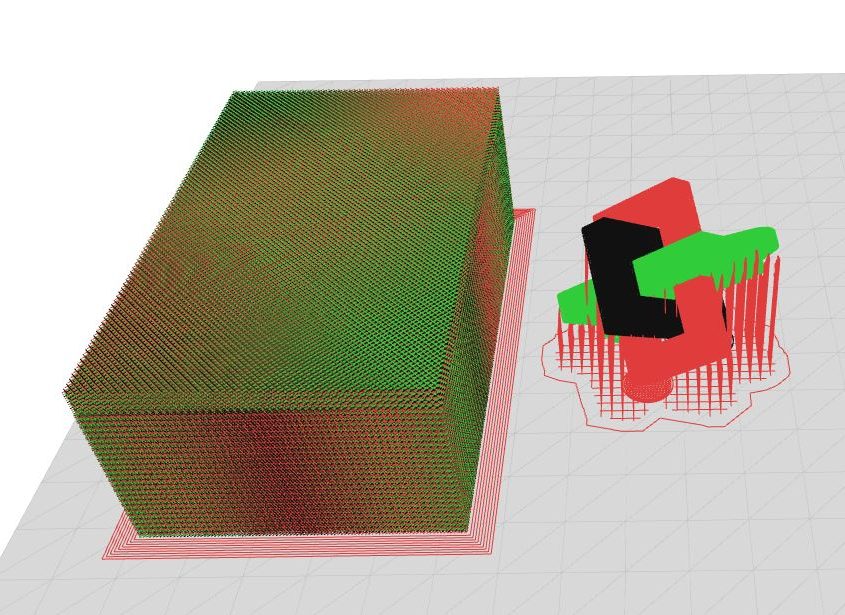
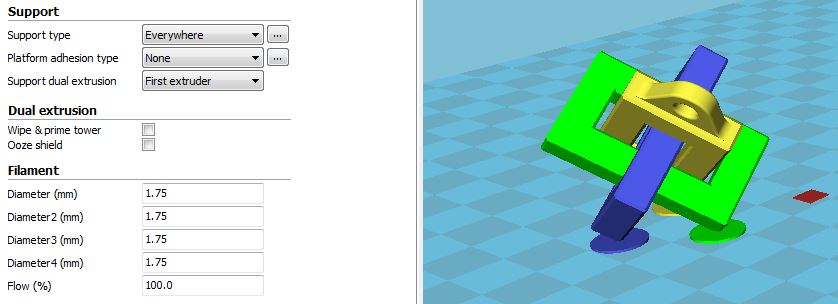
Good, we have 3 models associated to 3 different extruders. But once we decide to have the 4th material as support, Cura 15.04.6 does not allow to do it (starting from Cura 2.x generation there is a setting to choose the proper extruder for the support material). In fact, it is possible to choose only between the first and second extruder, but that means we associate the support and the model to be printed with the same extruder (the same material):
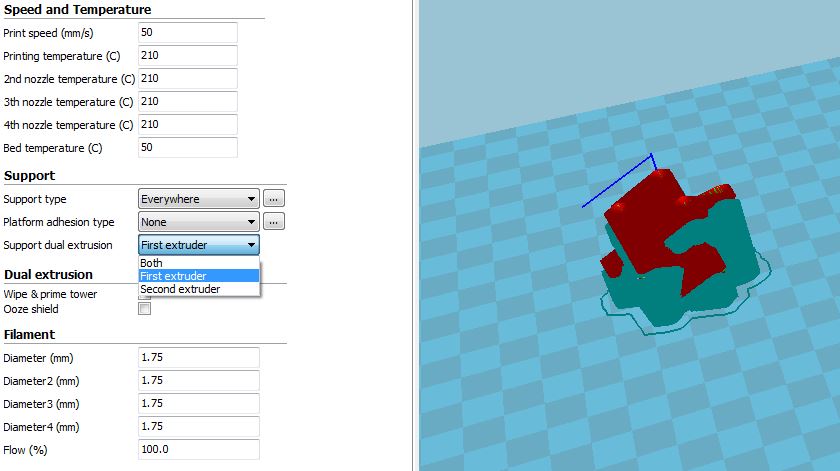
In case we want the support to be water-soluble we experience the following situation where one of the models is going to be eliminated together with the supports:
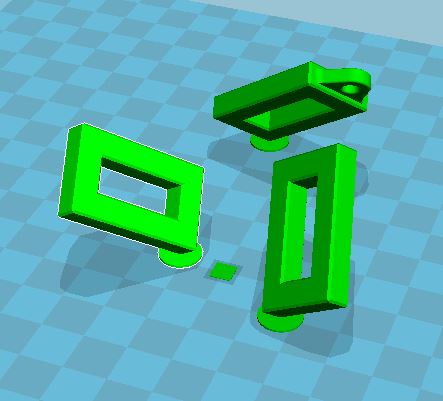
One way to solve this problem is to create a tiny model, associate it with the support material and then merge it with the other 3 models. I created a simple rectangle 5x5mm large and 0.2mm high, so that it will cause only the first layer of the print:
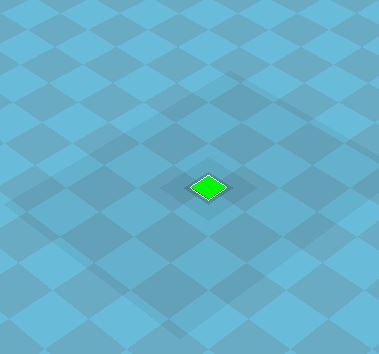
Cancel all the models loaded to Cura. This new model named tri_support.stl should be loaded the first:
Then load the three models for printing and merge them as before. Check that the Support dual extrusion is set for the first extruder.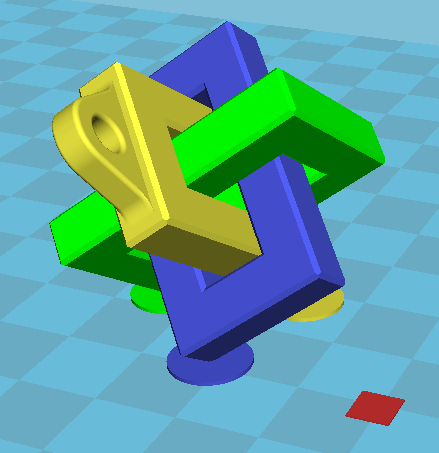
After saving the gcode and loading it in Chroma, we obtain thew following result: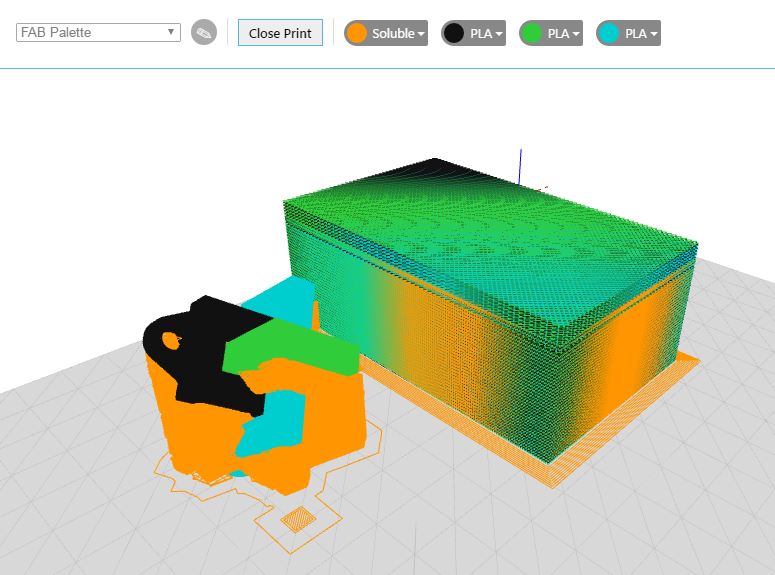
The soluble material is now associated only with the tiny rectangular and the supports, that will dissolve during the post processing.
The FABtotum and the Palette+ can both be now initialized with all the corresponding filaments loaded and the print launched as usual.
