FABtotum’s community highlights: 3Dprinting a moving carousel
Dear all,
these days have seen the Laser Head coming out on the store and quickly disappear again as you got them all in an hour or so. While we thank you once again for your overwhelming welcome, we still love the idea that with the FABtotum you can Make More.
Today with a new Community post, we’d love to introduce you Sinan, aka kralmarks on Instagram. He knows how small things can become great ones. He lives in Istanbul, Turkey, and he is quite new among us: his one is a FABtotum CORE and he’s been using it quite intensively. The project we’ll write you about is the first one he shares with us: we are sure we’ll read from him again anyway!
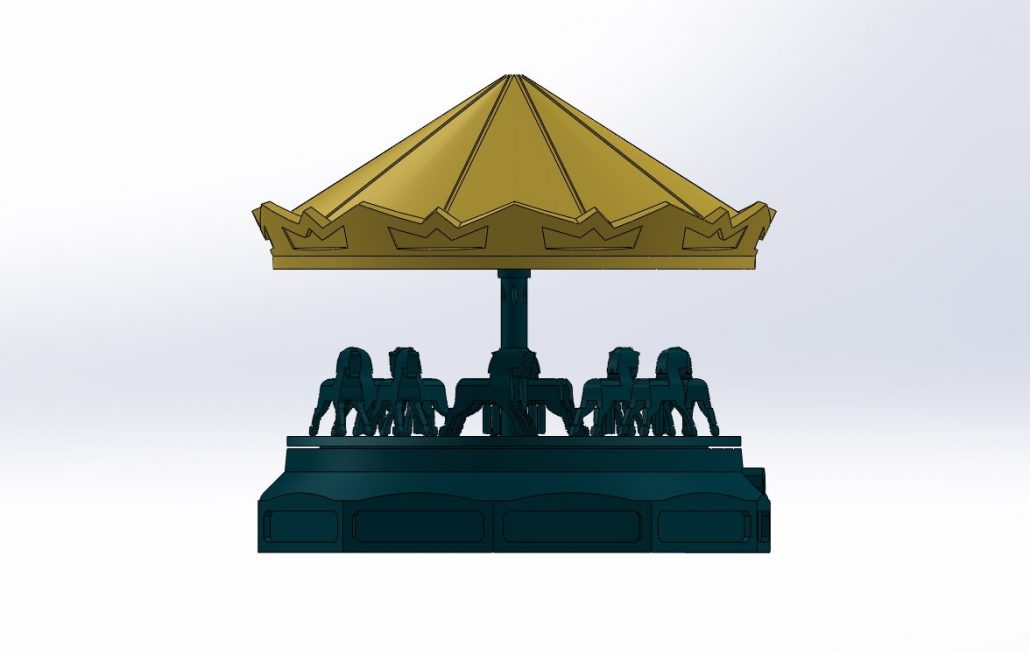
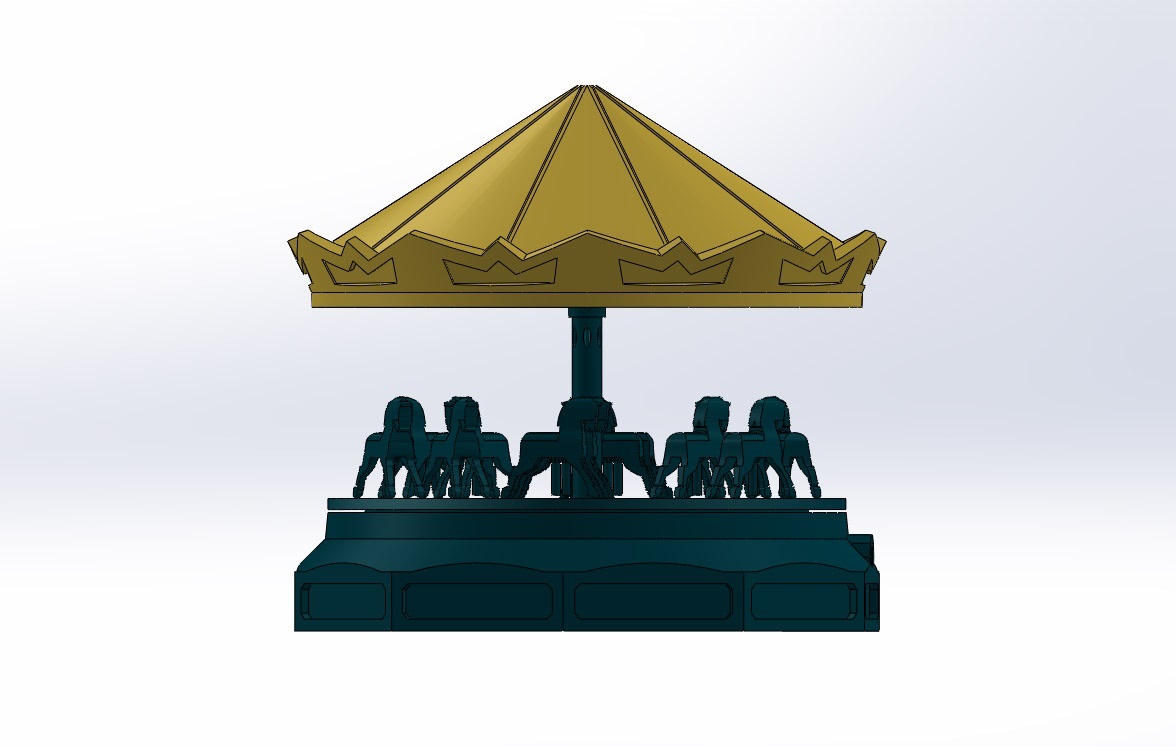
Sinan needed a great gift idea: 3D printing helped him and got him a solution: he therefore started designing a fully working carousel. It spins! It took a while to get the whole thing done but surely it will be appreciated. So, let’s see what he did.
From nothing to digital
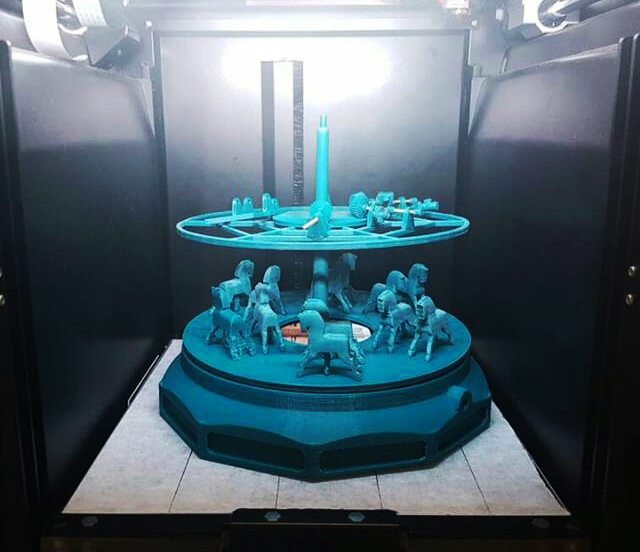
Sinan designed himself all the parts with the help of one of the most common 3D designing software. It took over a week to have all the components ready and as far as we know he could even add more timing to the final count as he still thought something was missing. The number of parts is about 50: many of them are unique pieces while smaller ones might be reprinted more than once.
He then had to make all the gcodes done. Until here, we’re still digital. Let’s see how he got his idea to real.
From digital to real
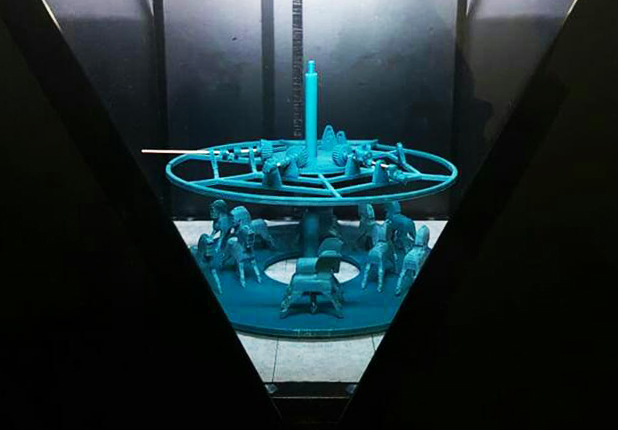
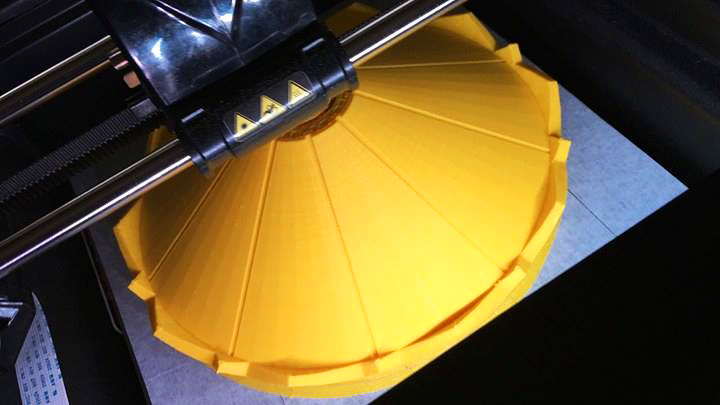
Once all the gcodes were correctly uploaded on the FABUI, the FABtotum User Interface you all should know quite good, he could start the 3D printing process. He used a light blue PLA filament for everything except the top. Could he change the colour at a random point to get a multicolor 3D printing? Maybe, ask him! He did not tell us why he picked this colour but we find the project itself is still so goodlooking that we did not even think of asking more. Also, the yellow top adds the missing contrast so we still love how it looks.
The total timing for 3D printing all of the small parts? 75 hours. Yep, the FABtotum has been printing for around three days. Stressing but nothing went wrong!
From pieces to final goal
The final step has been the toughest one: assembling all the small parts. Once he had everything on the table he then got the help of toothpicks and glue. He of course had a very clear view of the final look as he had to stick them so that they could still be free to move and spin.
You may want to know how long it took to have everything done: 20 hours. To be added to the previous ones of course.
So, it took a while but the gift is ready: surely the person who this project is for will appreciate both the idea and the efforts behind it. And you? Did you like it? Want to get one as well? Contact Sinan to know more!
Got a design you want us to write about? Contact us.
That’s all for this Community Highlight, thanks to Sinan, keep sharing!
Keep following us,
FABteam


Leave a Reply
Want to join the discussion?Feel free to contribute!