Calibrating the Laser Head focus distance

Getting Started
This guide will teach you how to obtain a sharp focusing point with the Laser Head.
BEFORE CALIBRATING: PUT ON THE PROVIDED SAFETY GOGGLES
The Laser Head uses a non-fixed 2-stage lens focusing assembly to obtain a very sharp focusing point.
For the purpose of engraving and limiting health hazards the laser beam has been focused at a fixed range, close to the lower tip of the Laser Head.
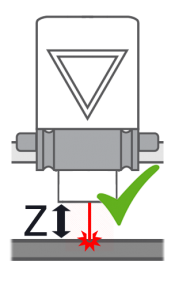
Therefore, being the focusing point now fixed, the distance of the Laser Head from the object to engrave or cut must be changed to match the focusing distance.
Usually the focusing point can be found 2 to 4 mm below the tip of the laser head and it can vary during the assembly.
The focusing distance must therefore be determined and saved during this calibration procedure.
First of all, let’s download the calibration sample Gcode at http://download.fabtotum.com/gcodes/material_test_pattern.gcode and upload it on your FABUI using the Object Manager.
This is an iterative process. The head will try to engrave different patterns at increasing power that will tell you if you overestimated or underestimated the focusing distance.
This test is also useful to find the right condition to engrave a specific material, as it cycles thru many speed/laser power ratios in order to obtain a good result.
Load the material_test_pattern.GCODE gcode file from the Make>Laser menu.
Proceed to put on your safety goggles and take note of the safety warnings and hazards that are listed before starting.
Calibrate the Z using either manual positioning or assisted positioning.
Now get yourself a normal 80gr piece of white printer paper, and place it on the build area (Milling side up).
If you use manual positioning you already know the heigth or perhaps you are using the last known position in a series of laser jobs, all at the same height.In the case of assisted positioning you will be asked to manually move the part you want to laser at around 1 mm from the lower tip of the Laser Head.
Then, after pressing ok , the height will be raised automatically to match the last saved position (3 mm if this is your first time calibrating).
The engraving will start and end within a minute.
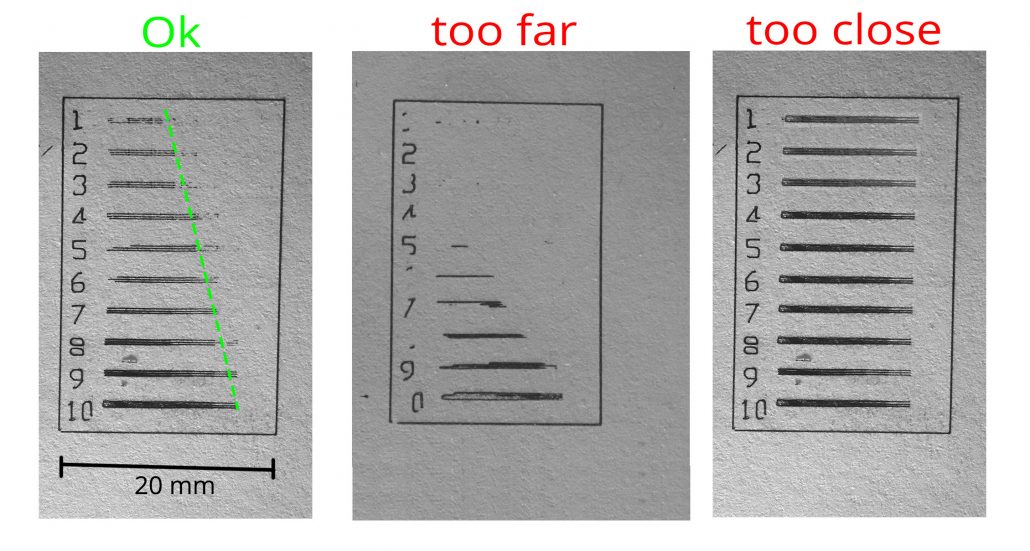
Once the process has completed a series of patterns like these should be engraved on the piece of paper.

Find and save the position
What you need to see is:
- A perfect rectangle, almost cut off.
- A sequence of numbers from 1 to 10
- A series of “gradient” lines that starts with 50% horizontal fill on the first line (1) and ends with a full black mark -100% fill – on the last line (10)
During the job execution, judge your result and change the Z height accordingly. You can do so by operating on the Z height override button in the command tab.
At the end of each print you will be asked to save the Z height changes.
Change it 1-2 mm each time and test it again, until you get a favorable result.
You can remember the height for later use or start using the Assisted calibration during the laser procedure preparation.
From now on the assisted calibration will return to the position saved each time.


