Slicing With Cura 2.x & 3.x
Cura is an open source software created and developed by Ultimaker. The FABtotum can work with .gcodes generated with Cura.
To upload one on the FABUI, refer to the FABUI overview.
Note: for legacy Cura 1.5 support, please refer to “Cura 1.5”
Installation
Installing Cura
Download and install version 2.xx / 3.xx of Cura at: https://ultimaker.com/en/products/cura-software
Locate Cura on your computer’s Download folder, install it and then execute it.
Installing with Windows
Double click on the installer located in your download folder.The setup procedure will ask you to choose if you want the program to open other file formats other than .stl (i.e. .obj).
The Wizard will also ask you if you want to install additional drivers to manage your printers. As the FABtotum does not require Arduino drivers for serial connectivity, you can avoid installing those.
Finally, you can click on “Run Cura” and finalize the setup.
Installing with Mac OS
Drag the Cura icon into your Applications folder to start installation.
Setting Up the Machine settings on Cura
The first time you open Cura you will be asked to choose your machine, select your desired language (English for this guide) etc.
The FABtotum Personal Fabricator is natively supported on versions of Cura higher than 2.6, all other versions of cura will require the user to download and install FABtotum profile packages here: https://github.com/FABtotum/FAB_Configs/
- Locate the installation path of Cura (eg: C:/Programs/Cura 2.6)
- Copy the folders contained in the downloaded folder “resources” (definitions, images, materials, settings, meshes, quality, variants) in the “resources” folder of the installation path
Note: Join the files and not overwrite them, as the software will stop working otherwise - Start the application.
- That’s it, you are ready to slice with Cura.
Note: Profiles are just a starting point and do not constitute a all-in-one solution for all geometries.
Remember that every object is different and has different needs.
FABtotum Profiles
Source: https://github.com/FABtotum/FAB_Configs/archive/master.zip
Slicing an STL model
Once Cura is configured, the correct FABtotum profile is loaded, and you have a model on your computer that you need to prepare for printing, you can proceed with slicing itself.
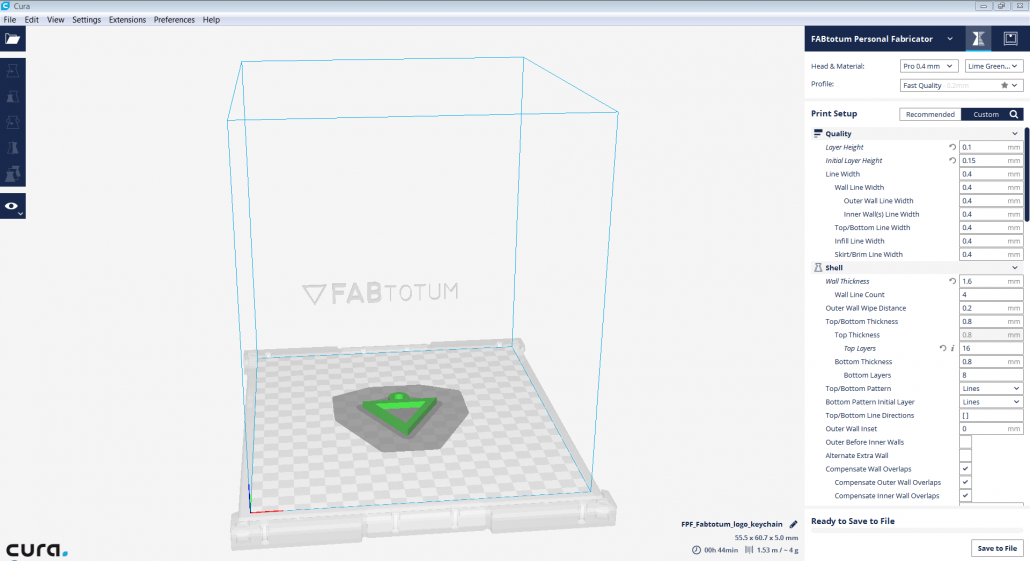
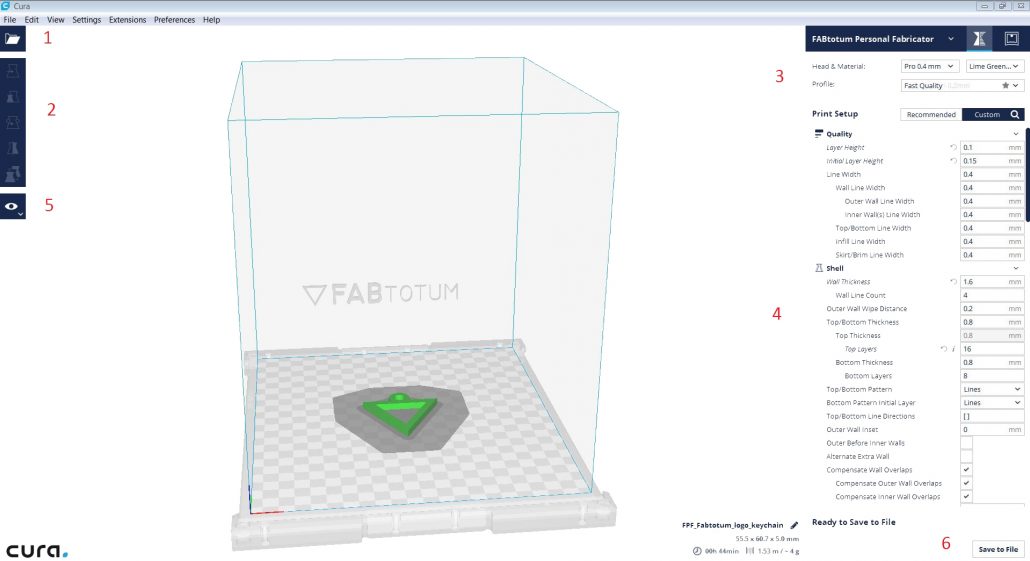
The task is pretty easy: just drag and drop an .stl or an .obj file to the interface (or select the folder icon “Open file” in the 3D view (1)), and the 3D model will load.
You can select it, move it, scale it, rotate it, mirror it and multiply it using the transformation tools (2).
Select the head, the material and the quality profile you want to use to print the model (Eg: Printing head Pro with 0.4mm nozzle in Lime green PLA in fast quality) (3).
You can vary the single printing settings (4).
Check how the machine will perform layer by layer (crucial thing to do) by clicking on the view mode icon (5), and save the .gcode by clicking the “Save to File” button on bottom right of the window (6).
Once you have saved your .gcode file, you must upload it to the FABtotum via the FABUI’s project manager. You can then proceed to print it as usual.
Sequential Batch Printing
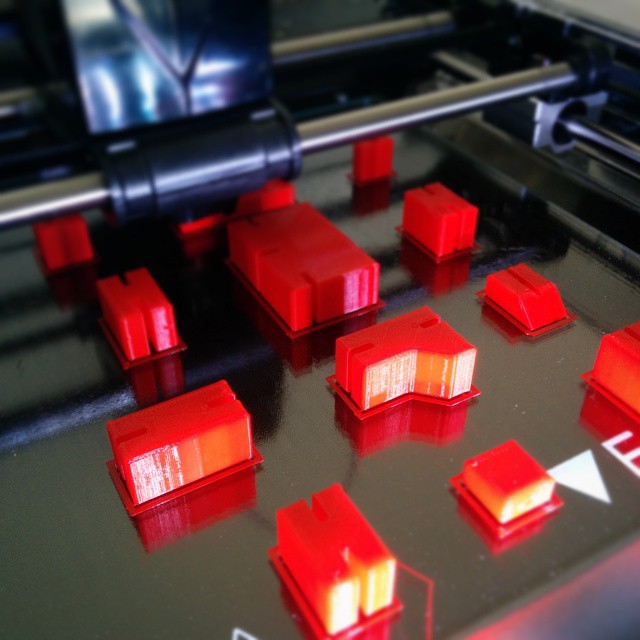
Both Cura 1 and Cura 2 allow to choose the mode of the batch printing: you can print many objects at the same time or one at the time.
This is very useful to reduce printing times and user intervention between multiple prints. It also allows to prepare gcodes of complete projects composed by multiple parts that can be printed in one task.
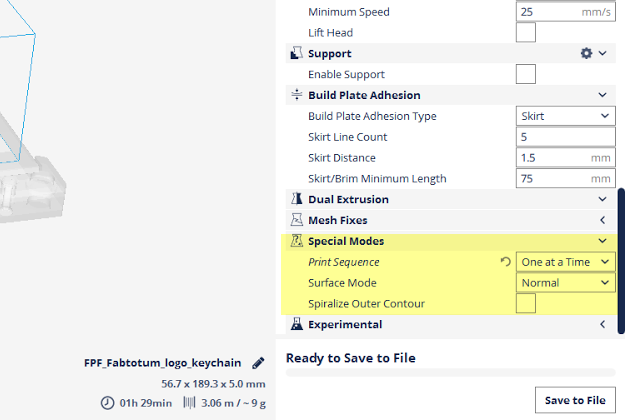
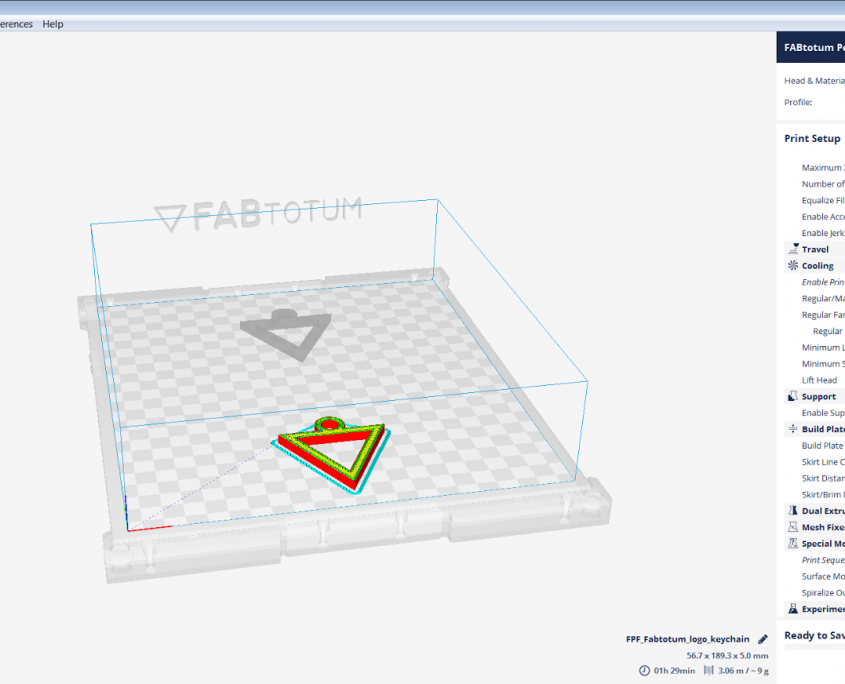
To switch between one mode to the other one modify the value “Print sequence” from “Special mode” section.
If you select the One at a time mode you will see the the printing volume reduced as size: this for avoid collision between the printed objects (that can have a height < = 17mm) and the carriage.
Common Slicing Parameters
Changing Parameters
Once you have tried our profiles you will want to make changes and create your own.
Here are some basic information on slicing.
-
NOZZLE SIZE: This is the tiny hole from which the material flows, the Hybrid Head has a 0.35mm nozzle, the Printing Head (PRO as well) a 0.4 mm interchangeable one as standard (more are available, their compatibility depends on the Head).
-
LAYER HEIGHT: This parameter corresponds to the height of each layer. A bigger layer means a less precise, but faster print, a smaller layer means a more precise, but slower print. The maximum layer height is calculated in relation to the size of the nozzle. You should divide the nozzle size by 2, that way you will get a good value to use as a maximum layer height.
Divide the nozzle size by 3, 4, or 5 to get good values for very high quality prints.
The minimum layer height is linked to material fluidity, for a standard PLA filament we achieved really nice results with a 0,05 mm (50 microns, 1/7 Nozzle) layer height. With a 0,03 mm (30 microns, 1/11 nozzle) layer the material started to curl while depositing and the surface finish was worse. -
SHELL THICKNESS: With this parameter you can choose how thick the outside shell can be. It refers to the sides of the object. The basic setting foresees you should double the nozzle size (i.e. if using our 0.35 mm nozzle you should set this parameter at 0.7 mm, with our 0.4 mm nozzle, the parameter should be 0.8 mm). However using the basic setting you may see the internal infill of the object from the outside, so this is not appropriate if you want to achieve good surface finish, but you will get a faster print and a lighter object. If you want to create solid sturdy objects, you should increase this as you like.
-
BOTTOM/TOP THICKNESS: This parameter corresponds to the thickness of the top and bottom shells. These are very important parameters for a high quality print. The higher the value the better the quality, but also the slower the process and the more material is used.
-
FILL DENSITY: This is the material fill percentage inside the object. Lower infill value means faster printing and lighter but more fragile objects. Higher infill means slower prints, but more resistant objects. Reasonable values range between 10% and 30%. If you are printing PLA, or another low shrinkage material, you can increase infill up to 100% (with ABS you will get a lot of warping).
There is a big difference between 25% and 24%: that’s because up to 24% the filling is in both directions for every layer; from 25%, Cura changes the filling direction at every layer. -
PRINT SPEED: This is another parameter that significantly influences print quality. This is the speed at which the machine will print. If you set a very high speed, the mechanical inertia of the machine will start to produce defects on the print. Printing at slower speeds facilitates the machine in following the lines and producing good corners, it also makes it easier for the machine to push filament to the extruder and to cool down the material.
A good range is between 30mm/s up to 120mm/s, with the most used values being between 50mm/s and 90mm/s. -
PRINTING TEMPERATURE: The value to set depends on the material you are using: for PLA a good range is 185°-210°, a good temperature to start is 190°. The material gets more liquid with temperature, so if you want to print at a faster volumetric speed, you will need to increase the temperature of your extruder a little or on the contrary if you are printing slowly you will need to decrease the temperature to avoid melting the material too much. Choose a lower temperature to print files with lots of overhangs.
-
BED TEMPERATURE: This parameter allows you to choose the temperature of the heated bed. We advise you set this to 40 if using PLA and 60 if using ABS. Max temperature for FABtotum’s Hybrid Bed is 100°C.
-
SUPPORT TYPE: You should use this when printing an object that presents vertical empty spaces. If set to “None” it won’t create any support. If set to “Touching build plate” it only creates a support where the support structure should touch the build plane. If set to “Everywhere” it will create a support also on top of the object.
-
PLATFORM ADHESION TYPE: These are options that you can select to prevent corners from lifting due to warping. “Brim” adds a single layer thick flat area around your object. “Raft” add a thick raster below the object and a thin interface between this and your object. Please note that if you enable either one of the two options, this will disable the “Skirt”.
-
FILAMENT DIAMETER: This corresponds to the diameter of the filament used. Our machine is designed to use 1.75 mm filaments which is the value you should put in Cura. Please always make sure to use our tested and approved high quality filaments when using our FABtotum, you can purchase spools on our store.
-
FILAMENT FLOW: This is the quantity of material extruded in percentage.
The ones above are basic parameters, if you’re an experienced user you can also work with the advanced settings below. -
RETRACTION SPEED AND DISTANCE: The speed is measured in mm per second and corresponds to how fast the filament is retracted while moving from one point to the other. A higher retraction speed works fairly well, but make sure not to set it too high to avoid grinding the filament. The distance is measured in mm and it corresponds to how much filament is retracted, set to 0 for no retraction, we advise you to set to 4 for good quality prints.
-
INITIAL LAYER THICKNESS: This parameter is used to set how thick you wish your bottom layer to be. Clearly a thicker bottom layer makes sticking to the bed easier. Set to 0.0 if you wish the bottom layer to have the same thickness as all other layers. We advise you to set this parameter to 0.23.
-
INITIAL LAYER LINE WIDTH: This parameter measured in % is used to improve bed adhesion and provides extra width to the extrusion on the first layer. We advise to set it to 120.
-
CUT OFF OBJECT BOTTOM: This parameter should be set when printing an object that doesn’t have a flat bottom as it sinks the object into the platform. This feature should be used to avoid for the object to detach from the plane.
-
TRAVEL SPEED: This parameter sets the speed at which the head moves when not printing. Suggested values for this are between 100mm/s, to 200mm/s.
(500mm/s is the maximum we tried but this causes a lot of noise and may slowly destroy the machine if used for longer periods of time). -
BOTTOM LAYER SPEED: It is important that the bottom layer is printed at a slower speed to allow it stick better to the bed, be aware that the bottom layer is the most important layer of all. We advise you set this at 25.
-
INFILL SPEED: This is the speed at which the infill parts are printed. When set to 0 the machine will use the print speed for the infill. The higher the speed, the faster the print. A faster print will, however, create a lower quality print, but if we consider it’s inside, unless you have specific needs, it can be somehow faster.
-
TOP/BOTTOM SPEED: This is the speed at which the top and bottom layers are printed. When set to 0, the machine will use print speed for them. We suggest you don’t print these layers too fast, as printing at a faster pace reduces printing time, but significantly decreases quality.
-
OUTER SHELL SPEED: This parameter corresponds to the speed in which the outer shell is printed. Printing it at a lower speed will improve the final skin quality, however too much difference between infill speed and outer shell speed can negatively affect printing quality. We advise to set this at 75.
-
INNER SHELL SPEED: This is the speed at which the inner shell is printed. This should be set at an average speed between the outer shell speed and infill/printing speed. If set to 0, printing speed will be used for the inner shell.
-
MINIMAL LAYER TIME: This feature sets the minimum time spent for a layer to cool down, before the next layer is put on top. We advise to set it to 6.
-
ENABLE COOLING FAN: This feature is essential especially during faster prints as it provides extra cooling.If you are an expert you can also work with even more advanced settings. This is achieved in Cura by going to → EXPERT → Open EXPERT Settings
-
VOLUMETRIC SPEED (Volumetric Flow Rate): A good way of understanding your parameters is calculating volumetric speed. This is the number of cubic millimeters the unit is extruding every second.
You can calculate it as per below:
LAYER HEIGHT (mm) x NOZZLE SIZE (mm) x PRINT SPEED (mm/s) = VOLUMETRIC SPEED (mm3/s)
You can change the temperature according to this speed (more volumetric speed, higher temperature) and the maximum volumetric speed of the material you are using. -
RETRACTION MM AND SPEED: Our machine is limited to maximum 18 mm/s in retraction speed, so you can stick to this value. As for retraction length, a good value to use it around 6mm (just change at maximum 1-2mm, small changes in this case can be useful).Parts with a lot of retraction can damage the filament, till it breaks, so it’s better to increase the fill of the part to get the filament to advance more during the print, hence the next retraction will be on a new filament segment.


