,

FABtotum’s Community Highlights: a framed woodplate for your beloved one

Wood engraving ideas. Made with love and FABtotum

Hi all,
today is Valentine’s Day! But: we all know that we should show our love everyday. Still, today we are so keen on spoiling our beloved ones that we could not resist as well: that’s why for this Community post we decided to introduce you Chema Alfaya; he lives in Spain and has a brand new FABtotum CORE, with all the tools. That’s why he could do what he did.

Chema wanted to get a present created for his second anniversary and could not resist but making one. He therefore realized a woodplate that he then put in a ABS 3D printed frame. A lot of work but he’s smart and he followed a very intelligent path to proceed. Also, he followed Alessio Cavalieri’s tips found on our previous post: that’s great to see how you learn from other users!

printed-frame-&-carved-woodplate_front-1


Designing the idea
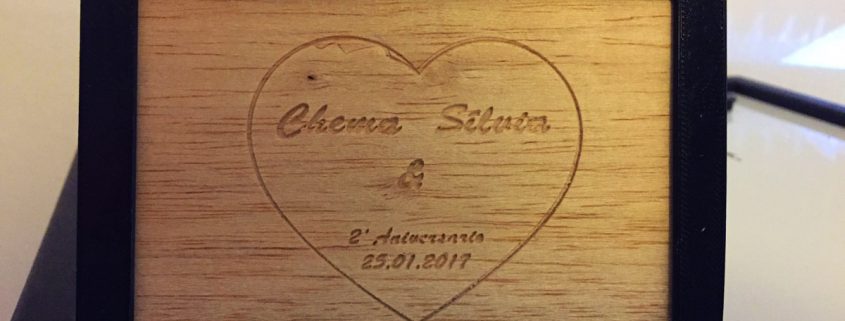
He got nothing to start from but his willing to get the present customized. He therefore used Adobe Illustrator to draw the heart and the text: the vector image was then translated into a GCODE thanks to makercam, the online tool. In fifteen minutes he had the design ready to be engraved.
He also needed to get the frame outfitted: he actually completed the milling part first, so that he could get the right proportion. In around an hour everything was ready. This time, he used SketchUp.


Making it real
We all live in a digital era but the FABtotum is still working on getting your projects to materialize.
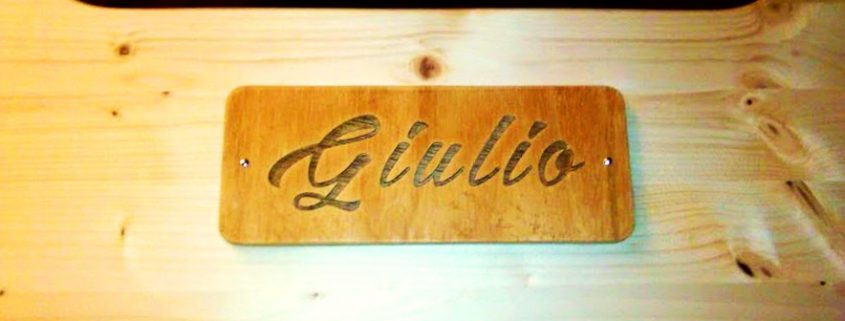
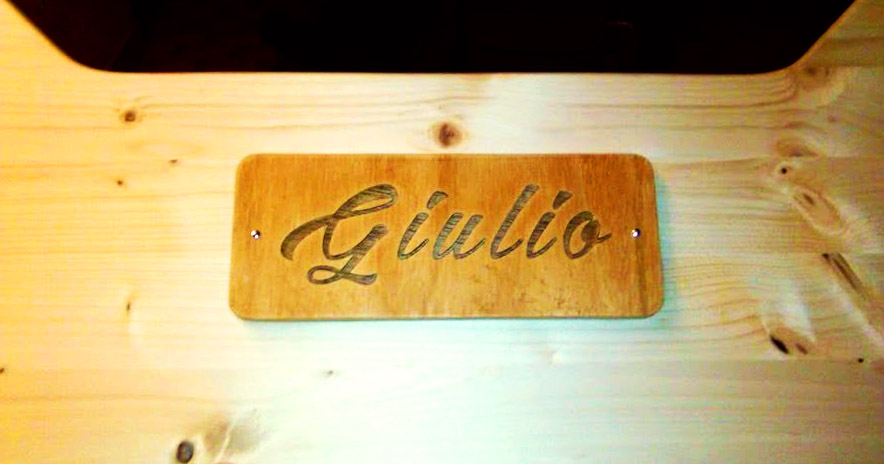
Chema needed to start from the engraving task as he needed to center the heart and the text. To get this done, he had to sand some material from the original piece of wood.

The letters needed a lot of precision, so he chose a V carve milling bit. When this kind of tool is used, the Milling Head should spin quite low as the bit itself is very fragile.
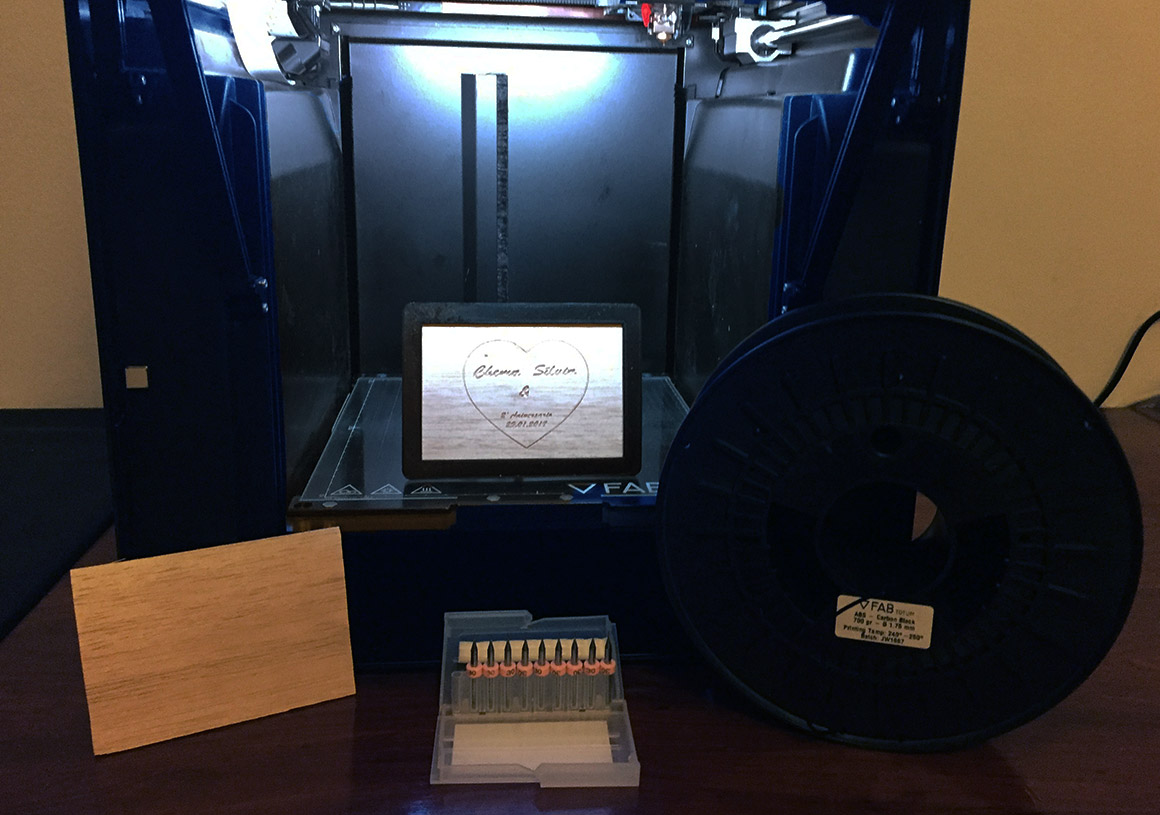
The woodplate was realized in a 2 hours task, with 0.1 increments on the Z-axis for a total of 10 passes. Again, speed was kept low to have a higher precision and avoid damages on the bit.
Tip: if you do not have a V-bit that can carve with such high details, you might need to resize everything so that the text still looks fine. As a reference, Chema used a 115x80x2 mm wood piece.
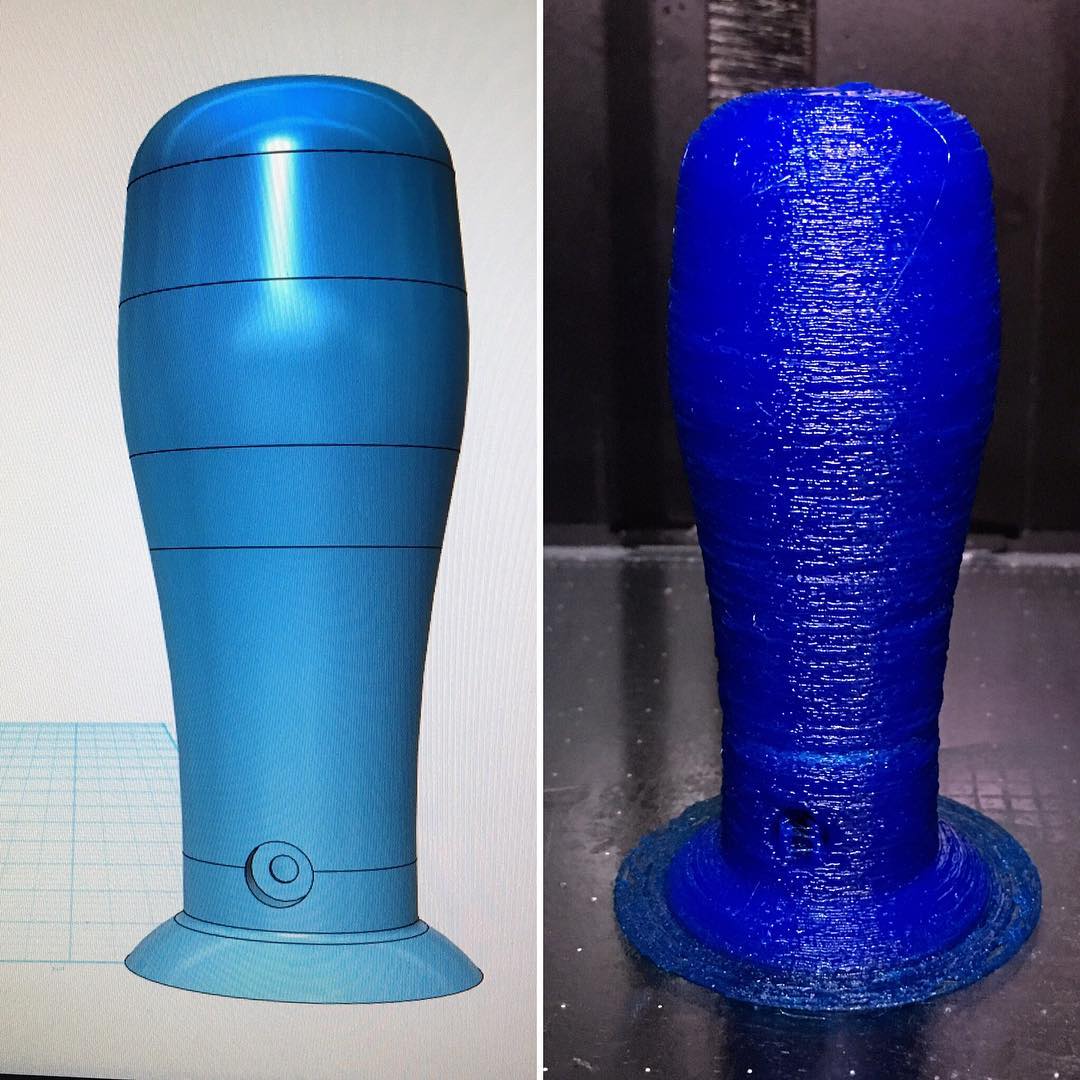
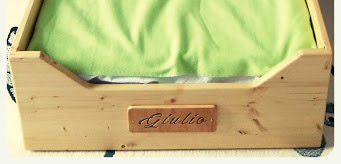
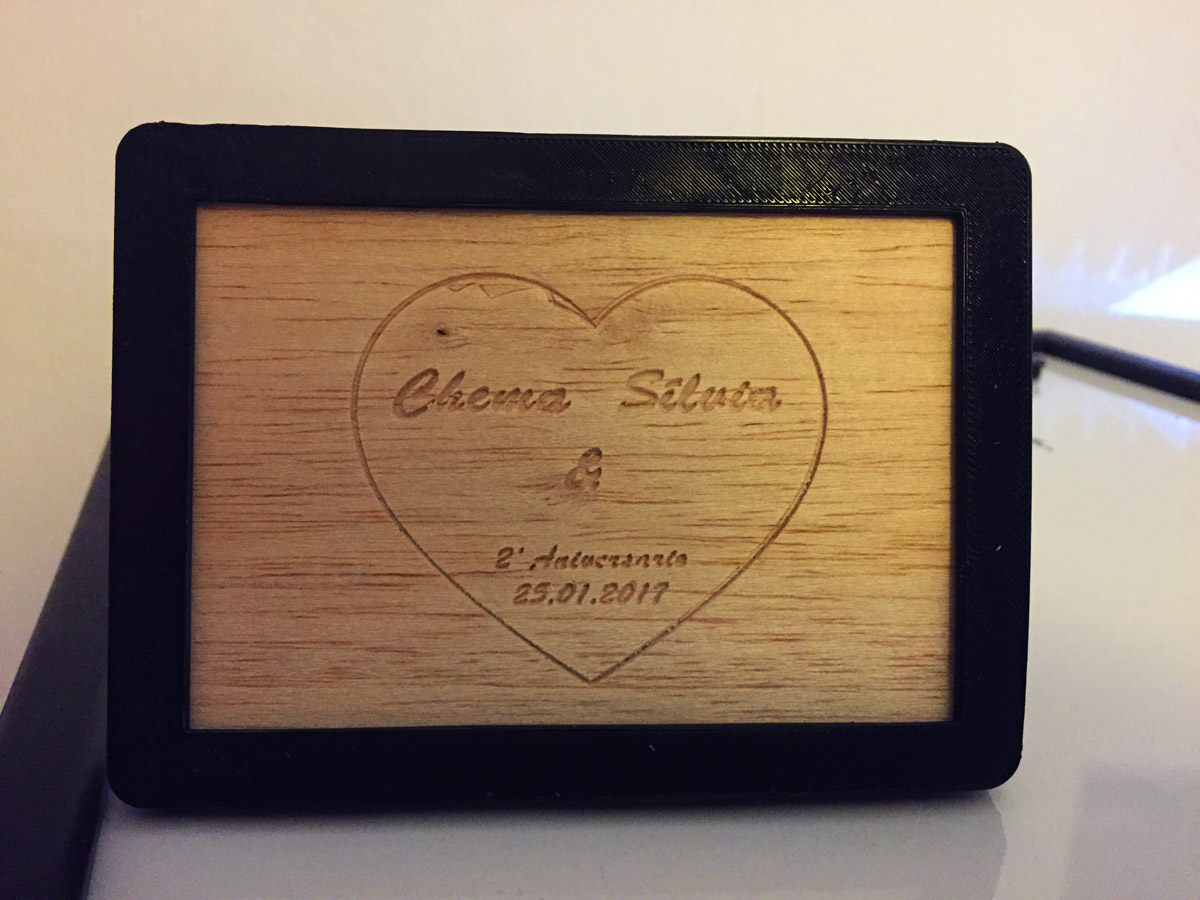
Once he knew the exact dimension of the plate, he could print the frame for a perfect fit. This task took three hours and it was realized with a FABtotum’s Carbon black ABS spool. Want to know the profile and the precise settings? Write him!

woodengraving_fabtotum-1


And…that’s it! The final look is just a great idea for a customized gift and today sounds even better. It just takes hours, so it’s a doable thing if you’re in a hurry! If you have a Laser Head, also, you can engrave the wood and get a whole picture or a more detailed jpeg reproduced.

So, that’s all for this Community Highlight and remember: it’s the thought that counts.
But if it is customized it’s better.

Got something you want to share with us? Have questions? Write us!
Want to ask Chema something? Write him!
We would like to thank Chema once again, keep following us!

FABteam

FABtotum’s community highlights: 3Dprinting a moving carousel

desgn project for a 3d printed carousel

Dear all,

these days have seen the Laser Head coming out on the store and quickly disappear again as you got them all in an hour or so. While we thank you once again for your overwhelming welcome, we still love the idea that with the FABtotum you can Make More.
Today with a new Community post, we’d love to introduce you Sinan, aka kralmarks on Instagram. He knows how small things can become great ones. He lives in Istanbul, Turkey, and he is quite new among us: his one is a FABtotum CORE and he’s been using it quite intensively. The project we’ll write you about is the first one he shares with us: we are sure we’ll read from him again anyway!


Sinan needed a great gift idea: 3D printing helped him and got him a solution: he therefore started designing a fully working carousel. It spins! It took a while to get the whole thing done but surely it will be appreciated. So, let’s see what he did.


3d-design-toy


From nothing to digital
Sinan designed himself all the parts with the help of one of the most common 3D designing software. It took over a week to have all the components ready and as far as we know he could even add more timing to the final count as he still thought something was missing. The number of parts is about 50: many of them are unique pieces while smaller ones might be reprinted more than once.

He then had to make all the gcodes done. Until here, we’re still digital. Let’s see how he got his idea to real.

3dprinting toy - fabtotum

From digital to real
Once all the gcodes were correctly uploaded on the FABUI, the FABtotum User Interface you all should know quite good, he could start the 3D printing process. He used a light blue PLA filament for everything except the top. Could he change the colour at a random point to get a multicolor 3D printing? Maybe, ask him! He did not tell us why he picked this colour but we find the project itself is still so goodlooking that we did not even think of asking more. Also, the yellow top adds the missing contrast so we still love how it looks.

The total timing for 3D printing all of the small parts? 75 hours. Yep, the FABtotum has been printing for around three days. Stressing but nothing went wrong!


3d printed carousel


From pieces to final goal
The final step has been the toughest one: assembling all the small parts. Once he had everything on the table he then got the help of toothpicks and glue. He of course had a very clear view of the final look as he had to stick them so that they could still be free to move and spin.
You may want to know how long it took to have everything done: 20 hours. To be added to the previous ones of course.


3dprinted toy

So, it took a while but the gift is ready: surely the person who this project is for will appreciate both the idea and the efforts behind it. And you? Did you like it? Want to get one as well? Contact Sinan to know more!
Got a design you want us to write about? Contact us.


That’s all for this Community Highlight, thanks to Sinan, keep sharing!


Keep following us,

FABteam

FABtotum’s community highlights: 3Dprinting a table football team

3D maker projects: printed table football. Toy 3D printing

Dear all,
today it’s finally time for a third Community Highlight post. Christmas holidays have got us resting for some days but now we are back with a new protagonist.

Today we would love to introduce you Carsten: he lives in Germany, where many FABtotums have been delivered during our lifetime. He has been using his FABtotum quite a lot and he always shares with us what he creates. He gets some help from his little Team of kids: isn’t it nice to join hobbies with the family?
We loved many of his projects. Want to follow them all? Look for @CaSu0815 on Twitter and for elradko on Instagram!

While we already know we’re going to share more about what he does, this time we picked the complete set of table football players. Actually, the whole project will be finished soon, as it is intended to include a whole structure. Nets, handles and other parts are going to be created with special filaments. But let’s see what he did until here and leave the rest for a future post.

3d printing useful projects


Printing the Teams…
…including bench-warmers
Before getting here he needed to get the design done. He therefore used 123d and made a simple player that could be reproduced endless times with a 3D printer. That’s what we like about the FABtotum, right? Being able to make your design and 3D print it.
In two hours the final figurine was ready to get in the real world.
So, with just one file, Carsten has reproduced two whole teams: the Red and the Yellow, for a total of 25 players, two batches (normally 11 figurines per team would be enough).
A good tip for 3D printing with better results: don’t forger to place supports when needed (as he did)!
How long for the prints? That’s a good question. As he did it in his spare time, he had the FABtotum running daily, so that with the help of his kids he could spend at least an hour a day for the project.
Want to reproduce your Team? Contact him!


Getting the work finished
colouring a 3D printed object
Actually, it is quite simple. Carsten used normal model paint from a famous brand specialized in modeling. As the players are printed in PLA, there is no particular problem in getting the work done. Paint will just make your 3D printed models multicolor. His kid, the football lover, picked the shades. Red and Yellow.
Once the paint had cooled down, he could then use a japanese brush pen for the fine lines. He got them hair and smiles.


3d printed table football


Ongoing project: handles, frame and missing parts
how to get a whole table football set 3D printed (well, almost…).
Time is never enough, so our fellow Carsten is still working on the other components.
Anyway, he already tried to create the handles. He already made the design and is currently testing materials. You know what? He will make all the handles with flexible materials and save the settings. Here at FABtotum we test everyday but it’s hard to cope with the market.
Carsten has been testing hard and will go on with other ones: contact him to see how he managed to print glowing, conductive and more special 3D filaments!


table football handle


Here are his first tips when it comes to a special filament:
– start from the middle of the temperature range suggested;
– read the suggested parameters ( speed, feed, heated bed, temperature);
– don’t leave the FABtotum unattended;
– make small corrections while printing to adjust (Feed, Temp, speed etc.) and take a note;
– set the notes in Cura or other slicing software, and print again
– feed and speed: these are the ones you’ll likely need to adjust;
– play with the nozzles (0.4 or 0.6 mm): with flex, bigger is better
– try more than once!

He will also need to cut a frame, but that’s another story…
So, we hope you like what Carsten does with his FABtotum. He is now approaching milling as well.§
We will hear from him again very soon, granted! If you wish to know more about his tests, you know where to find him.


That’s all for this Community Highlight: thanks to Carsten (aka elradko aka CaSu0815 once again, keep up the good job!

Keep following us,
FABteam

,

FABtotum’s community highlights: CNC milling a wood plate

3D Maker Project: Engraved Name Plate using the FABtotum Milling Head: detail

Hi all,

here we are again!
Time for a second Community Highlight has come.
As said in the previous post, we are willing to let everyone see what a FABtotum lover can do!

Today we would like to introduce you our friend Alessio Cavalieri: he is well known on the forums already, and he likes to get his name clearly written where and when he makes something new. This is why his nickname is simply alessio.cavalieri, easy right?
He did many things along the time he has been a FABtotum owner. Today we’ll see how he created an Engraved Name Plate using the Milling Head (actually he used an old Hybrid one).

cnc_milling_fabtotum_wooden_name_plate

How is it possible? Here is what he did, briefly.
The plate he used perfectly fitted in the FABtotum working area: a woodplate 200mm x 80mm. He started with some tests and tries on the designing side and finally got to the perfect version, which was then finally used as a gift. What a nice idea!
Good tip: he used a plywood that gets a nice finishing thanks to the natural texture of the different layers. Wood’s grain of the various layers will contrast between them, with a nice optical effect. Compared to a standard wood block, you’ll get a better look with no additional stress.


How to get a proper file? Inkscape example
Well, there are many software you can use to create a project for your FABtotum. Alessio decided for Inkscape, a free one that can be used with any OS. Just use it to write or draw.
Step by step, to get a doable object and a working file, he proceeded with writing the name, placed it on the surface and created the path. Here is how:
1. Designed the plate and placed near the origins (lower left corner): this is important if the final part is not as big as the block you start from.
2. Selected the text of the inscription and from menu: Path → Object to Path. The “Path” is what the CAM software will use as directions to move around and create.
3. Saved the design using: Save as → Plain SVG

How to create a GCODE with Makercam?
Alessio opted for Makercam, a free online tool (http://www.makercam.com/).
Before you upload your svg file, check these settings:
1. Set centimeters instead inches as default unit (if you’re fine with inches make sure to convert all the suggested values);
2. Select Edit → Edit preferences Set → DPI to 90 (suggested to import a drawing from Inkscape, set 75 for Illustrator)
Now upload your SVG and turn into a GCODE:
1. Open the plain SVG saved with Inkscape, make sure to delete any unwanted object;
2. Select the inscription/draw you want to be engrave, it must be red;
3. Select CAM → pocket operation, and add some settings:
name: writehereyourfilename
tool (mm): write here the diameter of your bit (Alessio set 1mm)
target depth (mm): set how deep you want to mill (Alessio set 2 mm)
safety height (mm): write here how much the Head should rise before spinning (Alessio set 10)
step down (mm): how deep the mill should go at each pass (Alessio set 0.25)
feedrate (mm/minute): movements speed (Alessio set 400)
plunge rate (mm/minute): (Alessio set 100).

You’ll need to set the above settings for each part of the design: to do so, simply select the part (n°2) and start again with n°3. In Alessio’s one, for example, he then needed to set screw holes and outside shape. Read the whole article he published on his blog or contact him if you want to know more!

Last part: get the GCODE saved properly:
1. Select CAM → calculate all
2. Select CAM → export gcode
3. Select all calculated toolpaths, export and save the GCODE file on PC.

As a safer procedure, check if the FABtotum will be able to get your project done. Check the outer path: is it going to fit? If yes, go for it!

Post processing the GCODE
Ok, one last step: as you will use the FABtotum, you’ll need the GCODE that Alessio set up for us (thanks!). It’s called MakerCAM2FABtotum, it’s on GitHub. It is essential to make sure that your 3D printer knows you’re going to get her something different to bite than some good PLA. It’s a Linux bash script but you can run it also in Windows. Ask him if needed!
Here is an example of what you can do:
fabtotum-cam-gcode
This will set the FABtotum’s Milling Head to spin at 12000RPM.
Ok you’re done! Now get on the FABUI, open the Object manager and proceed just as you are used to.

Final tip: add an extra layer underneath your starting block if you have cutout parts so that neither the Hybrid Bed neither your milling bit will get damaged.

milling_with_fabtotum_wood_plate


So, it looks like a long process and it might not be as easy as a sandcastle, but it looks great, right? Will you try yours? Do you have tips to get things done faster? We’d love to hear from you!

That’s all for this Community Highlight: thanks to Alessio.cavalieri once again, keep up the good job!


Keep following us,
FABteam

,

FABtotum’s community highlights: multicolor 3D printing

Multicolor 3D printing: high quality 3d printed miniature

Hi all!
As we truly believe in it, we thought that our community deserved to be highlighted. Many of our customers have been sharing with us their jobs: it is a source of pride for us to show you all of them and surely a source of inspiration for all of you.

So: from today on we will dedicate a post to our best users on a weekly basis.
Want to be one of them? Share with us your results, we’ll do our best to get them all published!
And don’t forget our social accounts: using them will get your objects straight onto the FABUI dashboard.
Today’s protagonist is: Angelo D’Angelo, aka @Johnnytrapano!
Our fellow has been using his FABtotum for a while now and many things have been created with it. Lately he stepped even further and developed a script than enables multicolor 3D printing on the FABtotum. Yes, really! He named it CFOG (Change Filament On the Go).


3dprinting-fabtotum-multicolor


How is it possible? Here is what he did, briefly.
He developed a gcode which has to be added where needed between the lines. It allows to pause the task, quickly change the filament and start again. It is possible to just switch the color or even choose a different material.
The CFOG gets your print layered in as many different kind of shades as you want: of course the layers only allow the texture to be horizontal, but it is a great starting point.

How to use it?
That’s pretty simple actually. Just fit the portion of code where you want to change the color: the print will automatically pause, unload filament and wait you for load the new one

Here below you’ll find some detailed instructions to use the CFOG script. If you need more information, you can write him anytime. Meanwhile, download it here.

  1. Open your stl file in your preferred slicing software, Cura will do.
  2. Set the print as usual, using our settings and tuning them according to your FABtotum.
  3. Save the gcode as usual.
  4. Open the gcode file and decide where you want to switch the filament. Every layer is well mentioned in the file, so you just have to get there and paste the CFOG code.
    Notice: Cura starts from layer “0” in the file but starts from layer “1” when visualizing the same one into the software. This means you’ll have to count down a layer to get the right one.
  5. If something is required to be set or done during the whole job, you’ll find it in the code, highlighted with three “!” symbols.

Additional settings:

  • Look for the last line starting with the command “G1” and copy it in the CFOG, just where needed (see below). Also: decrease the “E” value by 7: this will unload 7mm of filament from the hotend.multicolor-3d-printing-fabtotum
  • Make always sure to set a Z value higher than the Z layer height where you use the CFOG.
    This is where you need to do this:
    cfog-multicolor-3d-prints
  • Look up for the code below in the script: at this same line you need to change the “E” value with the first one you can find after the CFOG one. This will make sure that anything we changed turns back at the original gcode settings. Here is where to proceed:

gcode-multicolor-fabtotum

Once you get here, you are ready to save the file, get it on the FABtotum and print.
Of course, you’ll need to stand next to your 3D printer to be ready and switch color/material. Beeps from the FABtotum will alert you when it’s time to hurry up and operate. Make always sure to get rid of excess filament.
One last thing, as Johnnytrapano says on his blog post: if you need to change the printing temperatures, remember to do so by removing the “;” symbol from the right line and set the new value.

how-to-multicolor-3d-printing

Here are a couple of examples, you can find more on his website.

multicolor-3d-printed-object

3D printed cone: a standard icon

3d-printing-food-fabtotum-multicolor

A 3D printed multicolor hotdog


Download the full CFOG here!
This is the first post regarding users’ experiences and developments. The FABtotum is an open source project that aims to grow together with the people who use it. Once you get your FABtotum, you automatically become part of the team.

Have ideas? Know how to get this CFOG better? Maybe you know how to turn it into a self-guided script using some Python Code? Maybe you will just try as it is? Whatever you do, share with us your results!


Keep following us,
Alessia