Posts

,

FABtotum’s community highlights: multicolor 3D printing

Multicolor 3D printing: high quality 3d printed miniature

Hi all!
As we truly believe in it, we thought that our community deserved to be highlighted. Many of our customers have been sharing with us their jobs: it is a source of pride for us to show you all of them and surely a source of inspiration for all of you.

So: from today on we will dedicate a post to our best users on a weekly basis.
Want to be one of them? Share with us your results, we’ll do our best to get them all published!
And don’t forget our social accounts: using them will get your objects straight onto the FABUI dashboard.
Today’s protagonist is: Angelo D’Angelo, aka @Johnnytrapano!
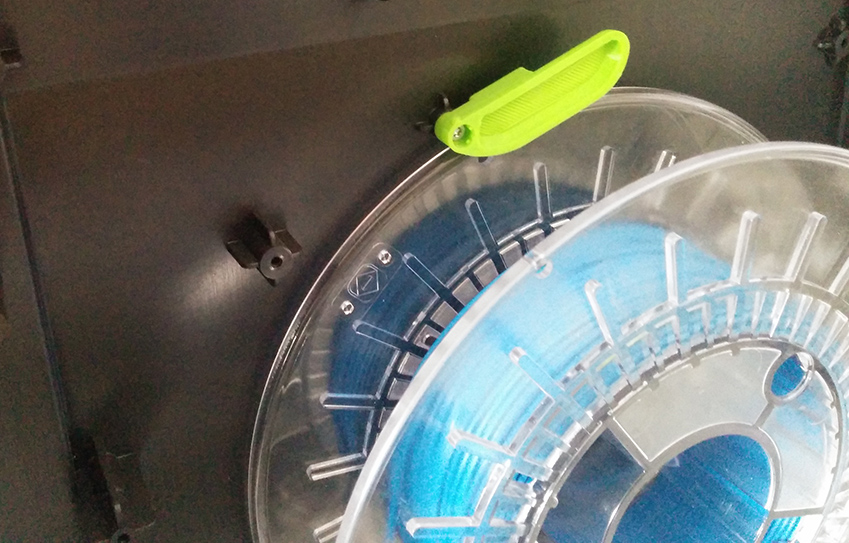
Our fellow has been using his FABtotum for a while now and many things have been created with it. Lately he stepped even further and developed a script than enables multicolor 3D printing on the FABtotum. Yes, really! He named it CFOG (Change Filament On the Go).


3dprinting-fabtotum-multicolor


How is it possible? Here is what he did, briefly.
He developed a gcode which has to be added where needed between the lines. It allows to pause the task, quickly change the filament and start again. It is possible to just switch the color or even choose a different material.
The CFOG gets your print layered in as many different kind of shades as you want: of course the layers only allow the texture to be horizontal, but it is a great starting point.

How to use it?
That’s pretty simple actually. Just fit the portion of code where you want to change the color: the print will automatically pause, unload filament and wait you for load the new one

Here below you’ll find some detailed instructions to use the CFOG script. If you need more information, you can write him anytime. Meanwhile, download it here.

  1. Open your stl file in your preferred slicing software, Cura will do.
  2. Set the print as usual, using our settings and tuning them according to your FABtotum.
  3. Save the gcode as usual.
  4. Open the gcode file and decide where you want to switch the filament. Every layer is well mentioned in the file, so you just have to get there and paste the CFOG code.
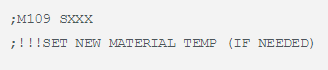
    Notice: Cura starts from layer “0” in the file but starts from layer “1” when visualizing the same one into the software. This means you’ll have to count down a layer to get the right one.
  5. If something is required to be set or done during the whole job, you’ll find it in the code, highlighted with three “!” symbols.

Additional settings:

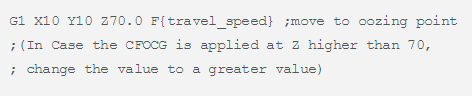
  • Look for the last line starting with the command “G1” and copy it in the CFOG, just where needed (see below). Also: decrease the “E” value by 7: this will unload 7mm of filament from the hotend.multicolor-3d-printing-fabtotum
  • Make always sure to set a Z value higher than the Z layer height where you use the CFOG.
    This is where you need to do this:
    cfog-multicolor-3d-prints
  • Look up for the code below in the script: at this same line you need to change the “E” value with the first one you can find after the CFOG one. This will make sure that anything we changed turns back at the original gcode settings. Here is where to proceed:

gcode-multicolor-fabtotum

Once you get here, you are ready to save the file, get it on the FABtotum and print.
Of course, you’ll need to stand next to your 3D printer to be ready and switch color/material. Beeps from the FABtotum will alert you when it’s time to hurry up and operate. Make always sure to get rid of excess filament.
One last thing, as Johnnytrapano says on his blog post: if you need to change the printing temperatures, remember to do so by removing the “;” symbol from the right line and set the new value.

how-to-multicolor-3d-printing

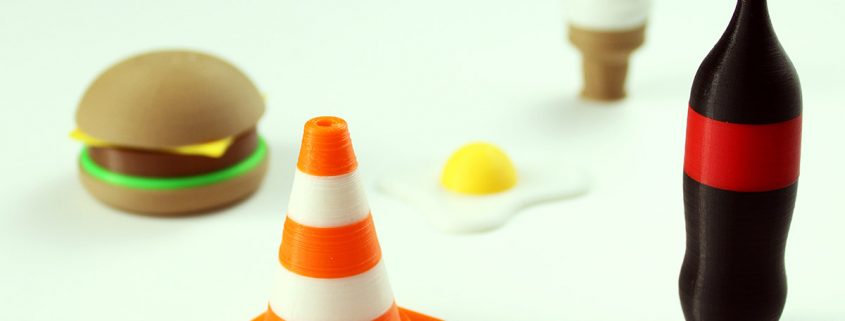
Here are a couple of examples, you can find more on his website.

multicolor-3d-printed-object

3D printed cone: a standard icon

3d-printing-food-fabtotum-multicolor

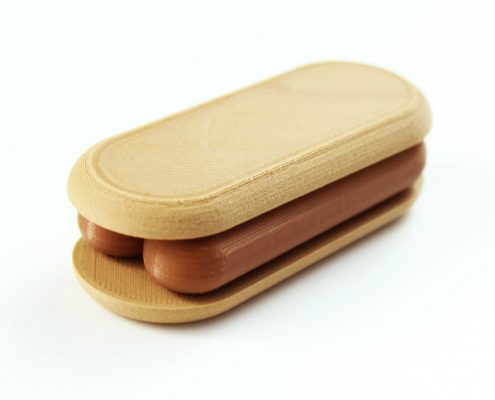
A 3D printed multicolor hotdog


Download the full CFOG here!
This is the first post regarding users’ experiences and developments. The FABtotum is an open source project that aims to grow together with the people who use it. Once you get your FABtotum, you automatically become part of the team.

Have ideas? Know how to get this CFOG better? Maybe you know how to turn it into a self-guided script using some Python Code? Maybe you will just try as it is? Whatever you do, share with us your results!


Keep following us,
Alessia

,

Sneak Preview: Hybrid Head V2, Laser Head and…

Best CNC and rapid prototyping materials: paper and cardboard

Hi everyone!

After a short break we are already back with some updates for you. Expect more in the near future, you’ll hear from us again really soon.
In the meantime we can tell you that, after two years from the start and one of production/deliveries, we have a bunch of new things that will be available in the upcoming days.

The Hybrid Head V2
We told you in the previous post that the Hybrid Head V2 is on its way: we’re not done yet with it though: we are still working on the last details; the final result will offer you the best performances ever and a better quality of prints.
While waiting for some smaller parts to be delivered and tested, we are already watching it printing fine objects.
In the picture below you can see some samples that show you the improvements: higher temperatures let us try different materials and we can proudly tell you we can print PLA, ABS and NYLON.

Samples of prints with the Hybrid Head V2

Samples of prints with the Hybrid Head V2

The specs are the ones previously released but we take the chance to sum them up:

  • full metal body hotend;
  • improved fans system;
  • completely interchangeable nozzle (which means easier maintenance/replacing);
  • completely interchangeable cartridge;
  • different nozzle sizes available (we will tell you more later on);
  • 260° max working temperature.
First pictures of the Hybrid Head V2: final look may still change

First pictures of the Hybrid Head V2: final look may still change


A new Feeder
The feeder mechanism has now become simpler and does not require any action to switch between additive and subtractive mode.
No more buttons to be pushed: new FABtotums will have a slightly different feeder and won’t have any hole on the back inner panel.

What if you already have a FABtotum and want this to be available on yours as well?
We will add a dedicated note on our wiki as you need to manually change it before switching to the new version from the settings of the FabUI.
This is something we decided to change as a consequence of the community’s experience. That’s why, once again, we are always looking for your feedback.

Scanning update
Out of the three first capabilities of the FABtotum, scanning option has always been difficult to be used. Results were not always reliable and satisfying. We worked hard on this as we wanted to offer you a better product. In the upcoming months we will focus even more to have you less stressed when postprocessing. Shapes will be less deformed, the camera is going to add colours and details to the final result. We will tell you more as soon as we have news and we will always update our development log on the forum as well.

Developing the scanner results

Developing the scanner results


A more complete Wiki
First year of FABtotum’s life also gave us a better idea of which were the main obstacles between a bad print and a good one: 3d printing can require a bit of knowledge first and our machine as well need to be “discovered”.

To help you (and to help us as well) we are little by little completing the wiki: a lot of new contents have been added every now and then and still are. Our Team together with the community increased the literature available online so that troubleshooting and first steps became easier.
You can give it a look and find out yourself here


An idea of all the components of the FABtotum

An idea of all the components of the FABtotum

All the documents are now on GitHub
We have gone even further than that: loyal to our Open Source identity, on Git Hub we added every missing specification. From hardware (already available on GrabCAD) to software, everyone can see what the FABtotum is made of and how it works. Suggestions are appreciated, simple curiosity is also welcome.
Here is where you can find everything

Laser Head
It has been in our projects since the beginning and it is now pretty much ready. We are still testing it, but the first results have seen our smiles rising and shining on our faces. It is not mentioned to cut hard and thick materials: we still prefer to leave this kind of job to the milling motor. Now you can throw away that smelly mutated seabass of yours.
With the laser head of the FABtotum you can:

  • engrave woods, plastics etc;
  • cut thin sheets of paper, cardboard and plastic.

You cannot:

  • cut thick plastics or other thick materials (>0.2mm)
  • pretend to be an evil scientist.
Testing the laser precision and quality

Testing the laser precision and quality

The new head won’t replicate the capability of the milling head. However, as you may know, laser engraving has a much more higher precision. You will be able to write or draw lines on the mentioned materials, as well as cut what would be too soft of thin for a drill bit.
The power of the laser we will use is 500 mW: nothing too powerful, just enough to do what’s needed.
This means that it won’t be too dangerous or require special equipments, but it will still be better to use a bit of extra care when turned on.
This is how it will look like, more or less:

First pictures of the Laser Head - final look may be slightly different

First pictures of the Laser Head – final look may be slightly different


It will be easy to be mounted on the FABtotum and won’t require extra calibrations in addition to the ones you would normally do.

Coming soon…
Today, then, we can say we already pushed the envelope a bit further than the first idea of FABtotum, born two years ago on Indiegogo.

The three Heads: the V1, the V2 and the Laser Head

The three Heads: the V1, the V2 and the Laser Head

But, as said at the very beginning of this post, we still have other great news coming soon…

teaser

Keep following us!


*Available from next release, due on 20th August.

Replicable Parts & Slicing Profiles

survival_kit

Hi Guys!
Today we release a first batch of printable designs that are very usefull to all FABtotum users.
These replicable parts will soon be pre-loaded on all units and licensed as CC-BY-SA.
Along with those a new open source repository has been created to keep the slicing configuration binaries (and possibly other applications ) up to date.
Slicer and Cura profiles
You can find all configurations avaiable for the Slic3r and Cura Softwares on our FAB_configs Github repository.
Instructions on how to use them and what they do are available on our wiki
These profiles (Cura Profiles in particular) have been updated and upgraded to introduce retracts, jumps and other tricks to increase quality of the prints.
Feel free to send a merge request for new or improved profiles as well!
On the Cura page of the Wiki you’ll find how to set up the FABtotum to print multiple models at once in sequential order.

batchsample


Additional Replicable Components
Replicable componenents are meant to expand and increase usability of the FABtotum.
We start off with a 4th Axis mendrel that can be mounted on top of the existing flat disc.
The 4th axis mendrel can accomodate different material stocks of different sizes and shapes for machining parts
on the 4th axis or hold rigid, heavy objects during the scan.

PIMP MY FAB Assembly Instructions

PIMP MY FAB Assembly Instructions
The second part is a Camera Dust cover, that can be mounted to keep the camera away from machining dust.
The Dust cover works with a snug snap-on fit, so it’s easy to manually remove when necessary.While a clean cloth can pretty much clean the camera (or canned air works fine) a dust cover is always useful.


PIMP MY FAB Assembly Instructions


As some of the user reported smal particles of dust getting in to the left side panel from the endstop holes, we created a pair of clips that covers the area and limit the dust entrance.


PIMP MY FAB Assembly Instructions

PIMP MY FAB Assembly Instructions


Finally, an easy Spool lock-in place lever that is made to hold all spools close to 200x55mm in size inside the spool vane without the need of extended rollers (i.e. most of the suppliers today).
just tilt the lever up and the spool will come off. gravity will hold the lever down and the spool in place during normal operations.
spool_holder
There are more parts available,like the spool rollers made by the community.
Others will be added soon and be available for the community.
You can find all FABtotum-related parts by surfing the FABtotum Replicable Addons collection on Thingiverse.