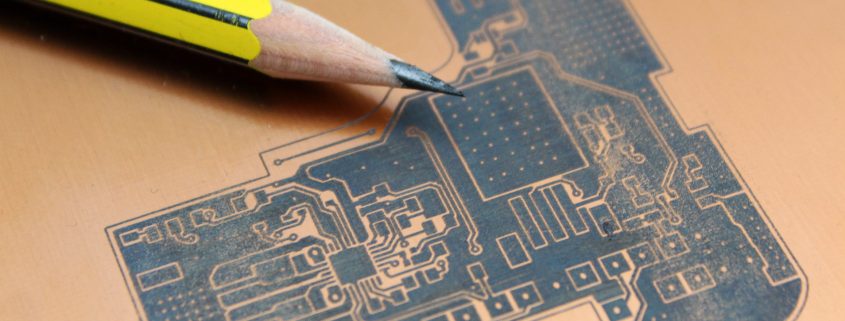
FABtotum’s Community Highlights: time to play!
Hi all,
we’re ready to share another story with you.
In these days many things are coming up, from events (have a look at our agenda!) to national holidays. But Giovanni Mancino, the protagonist of this Community Highlight, has so many projects alive he barely manage to get everything done right on time.
He has a small business starting up and here are a few ideas that came out of his FABtotum that will get him right where the people need him.
He has been using the FABtotum Personal Fabricator with an Hybrid Head and he got skilled little by little. Today he is pro user!
The Juventus Clock
Hard task for a guy who is an Inter FC supporter. You know italians are crazy for football. It was not too hard for the FABtotum though! This was one of his first tasks and was a gift for a friend.
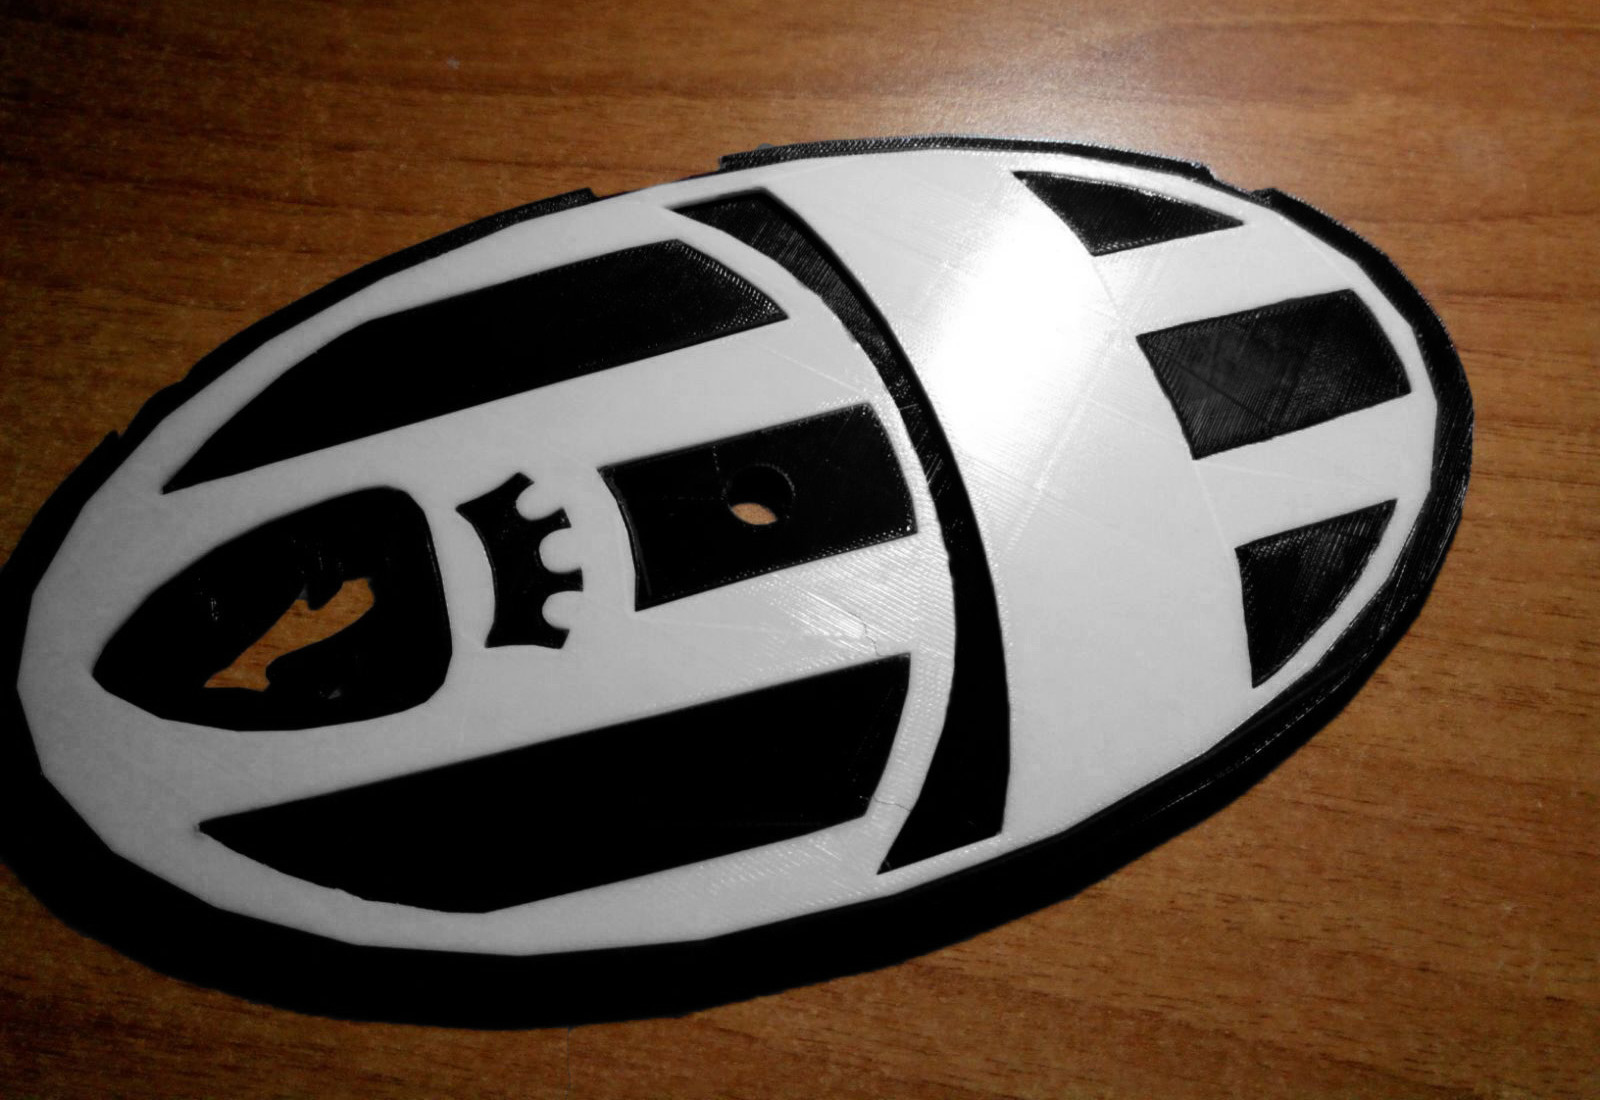
Here is what it took:
- 12 hours of modeling;
- 14 hours of printing;
- 0.5 hours to get everything together and sand off where he got too far with tolerances (we all know how disturbing tolerances can be, right?)
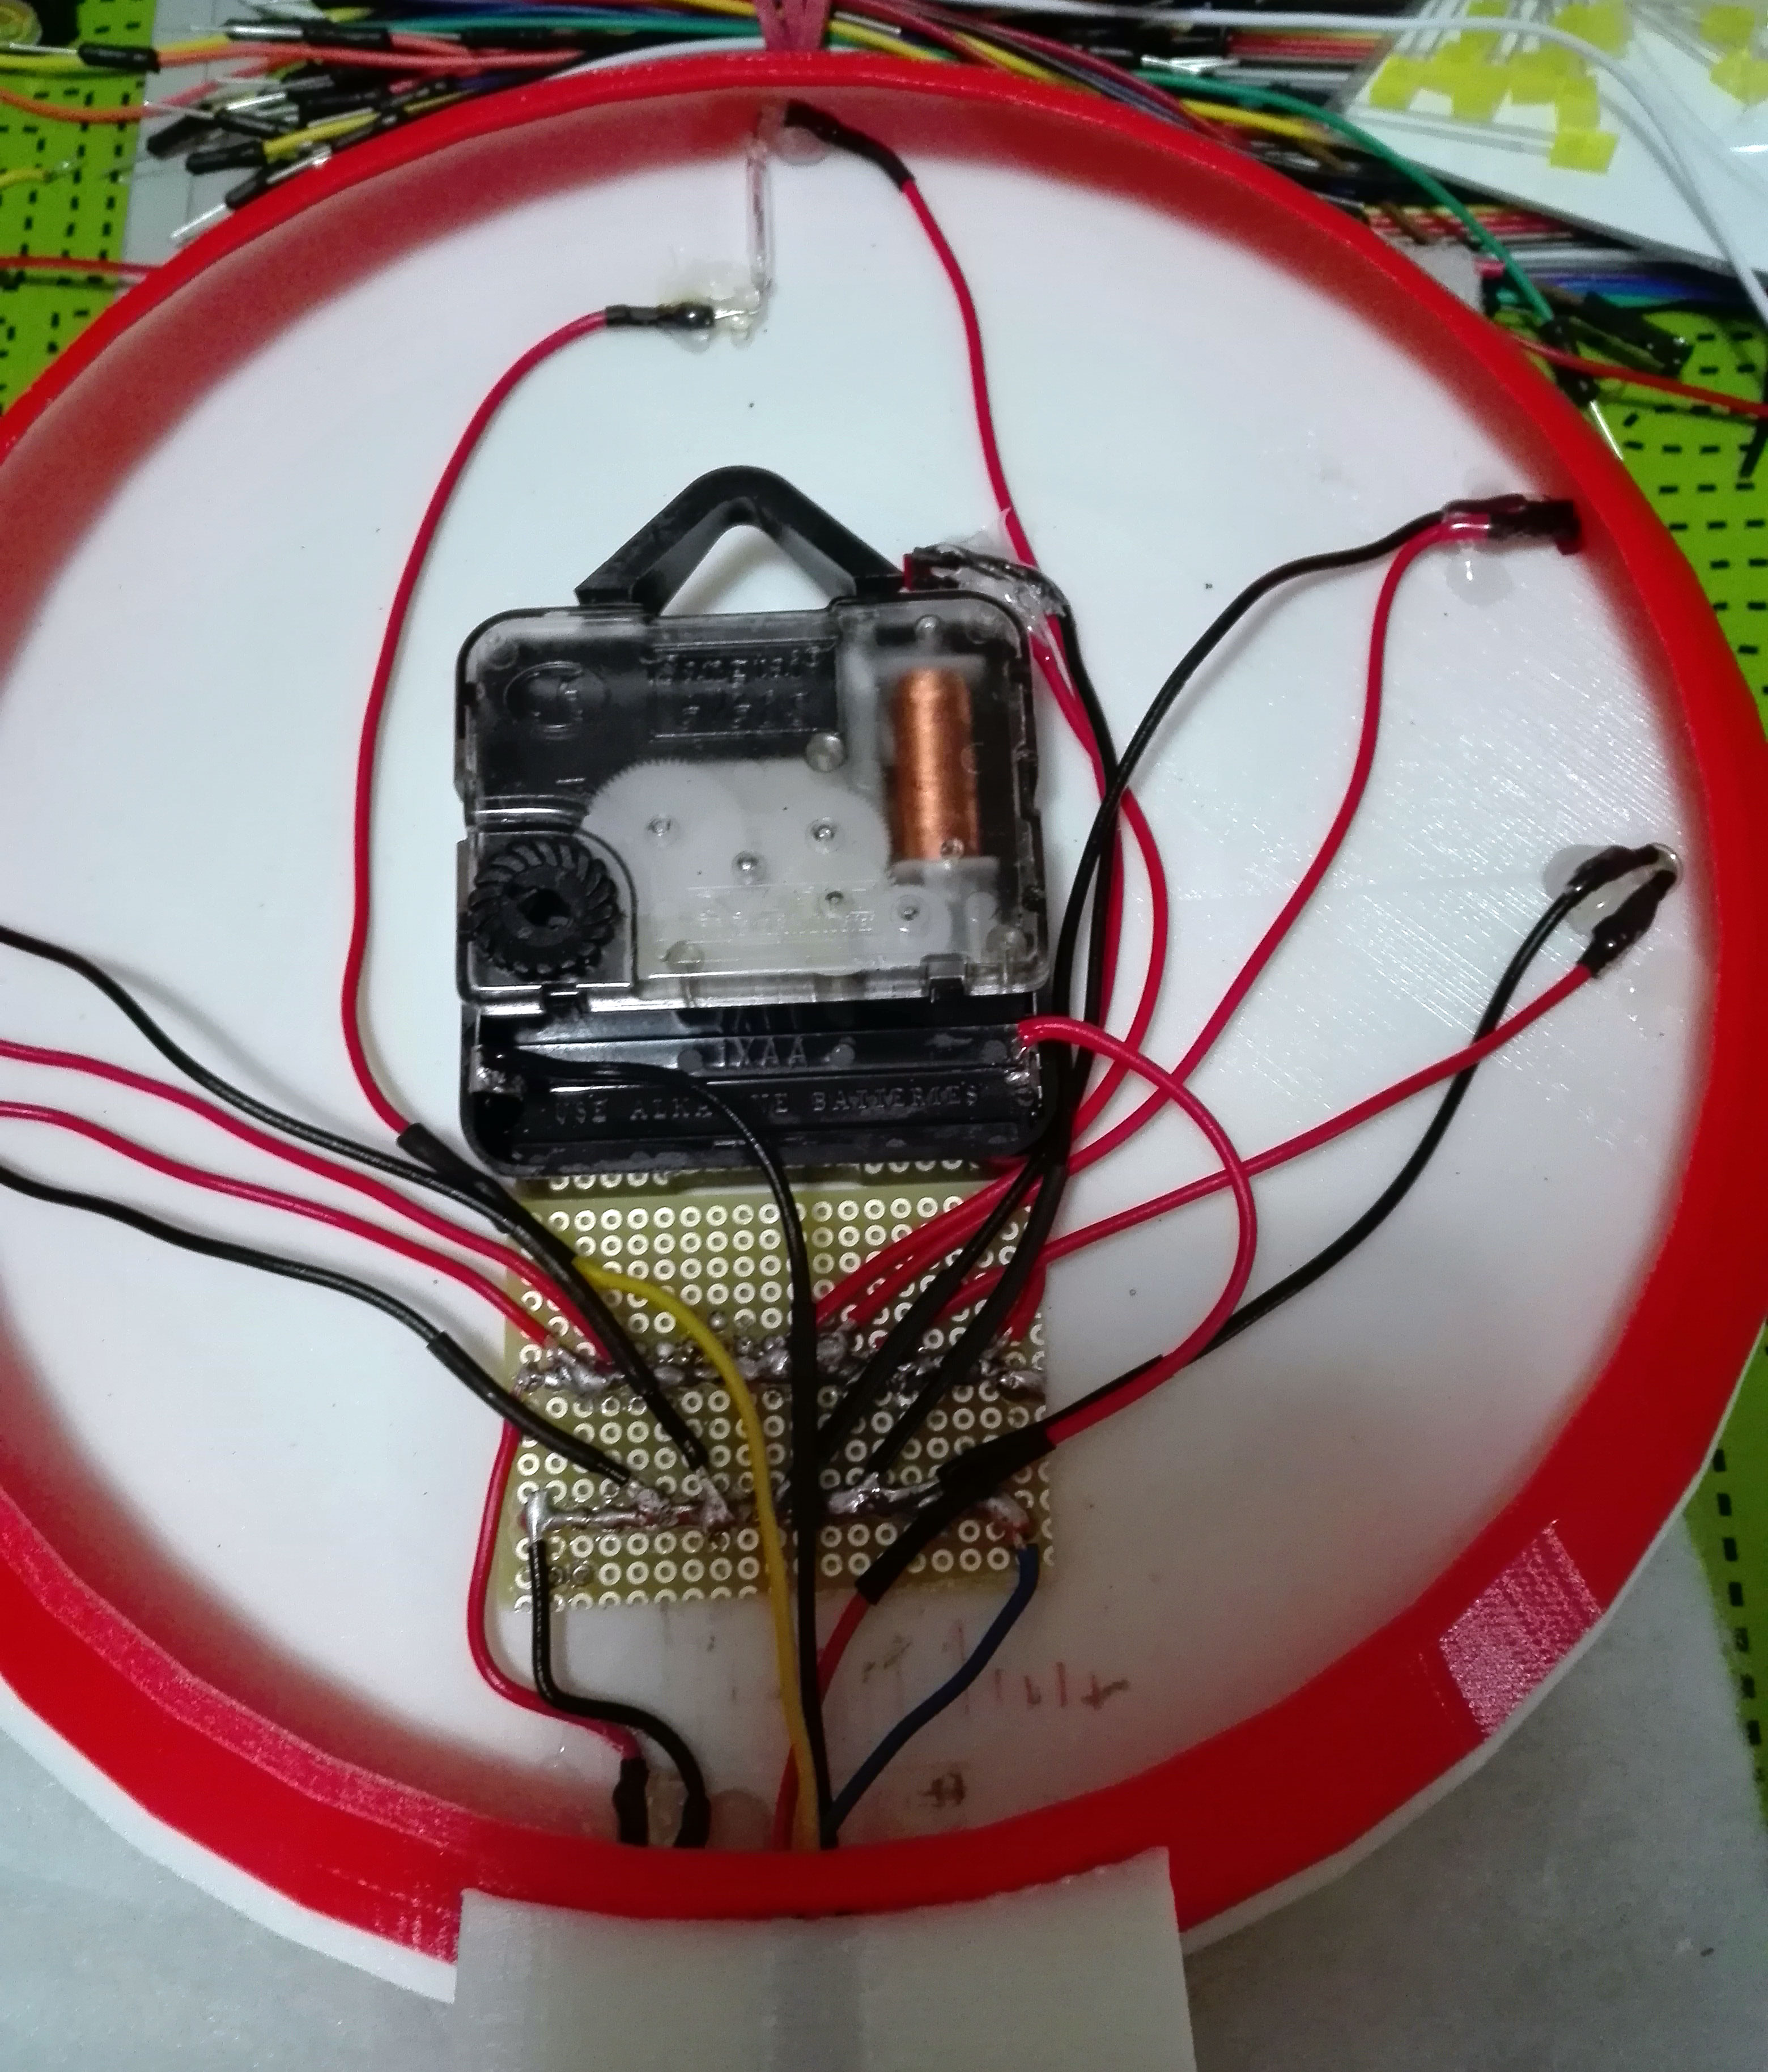
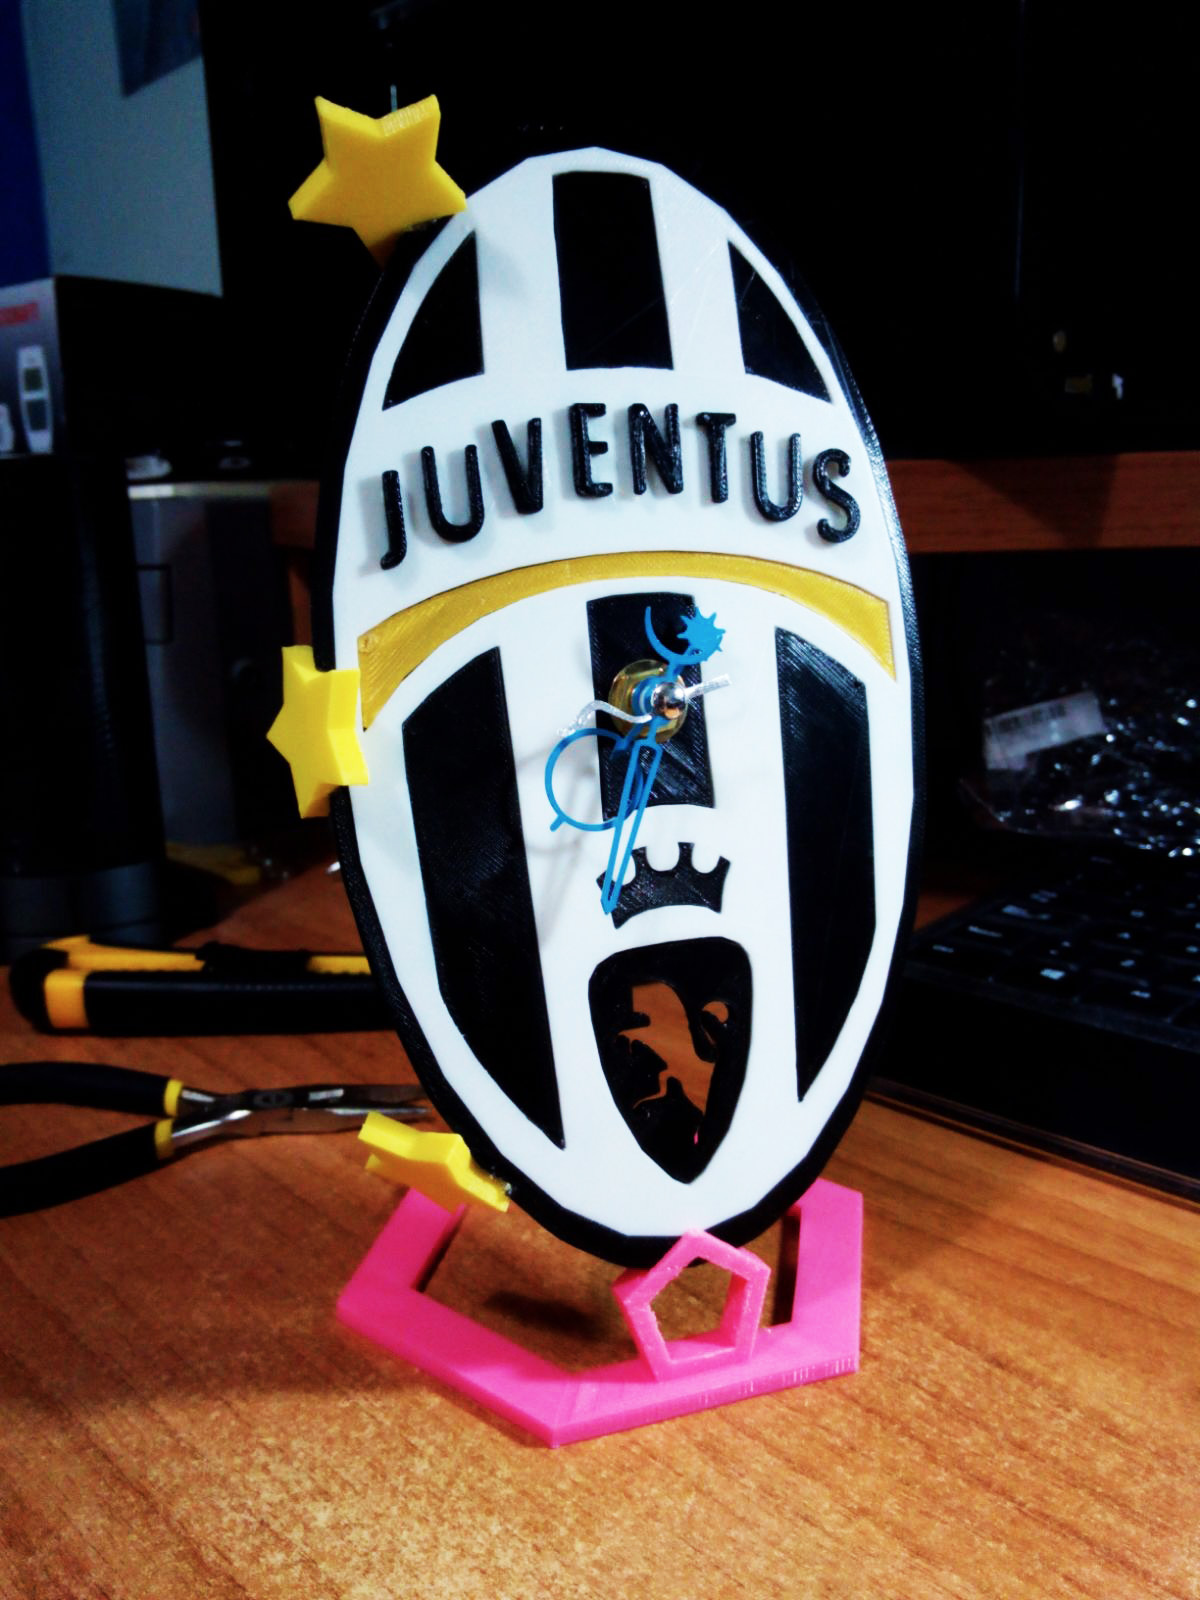
He used the colors of the team (black and white) and then designed a pink stand composed by two polygons forming the ball (the hexagon and the pentagon). The color represents the very first uniform, which had a pink t-shirt. As you can see from the pictures, he then needed to mount the motor and make the clock functioning. We’ll show you the picture of another clock he made just to get you an idea on how he could do this. So yes, he can 3D print clocks. Amazing right? But that’s not all!
And here you have the final look, of course it is completely functioning!
The Trumphets set
Here in Italy we normally give a small item as gift/souvenir for the special events. Everything is a good reason: from births to anniversaries, weddings, graduations, licences… just everything.
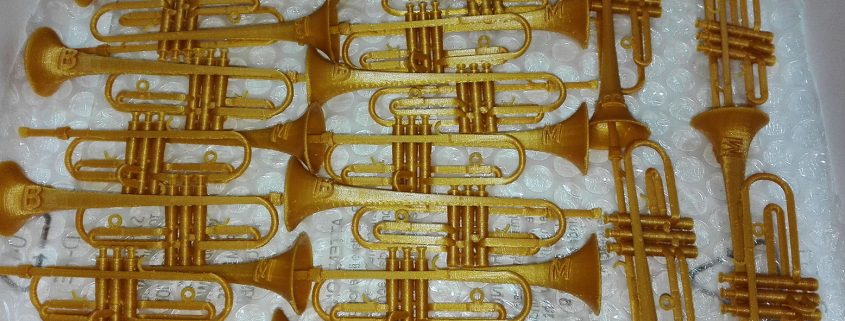
Giovanni made these cute trumphets for a guy who got his conservatory graduation in…well, that’s obvious, right?
Here is what it took:
- 1.30 hours of modeling;
- 3 hours of printing;
- 7.50 hours of post processing.
Reading the numbers it is easy to understand that the hardest part was the latest. Easy to shape, easy to print…with lots of supports. As you may know, supports are the materials printed to preserve quality when angles and curves can be too difficult. The extras will sustain the final object so that nothing gets damaged or of poor quality. Supports then need to be scratched off gently. Depending on the used slicing software, they can be different in thickness, shape, and distance from the object. They need to be carefully set, otherwise they can be useless or, in the worst scenario, they can even damage the print.
Giovanni used a scalpel to make sure that all the small 3D printed trumpeths were nice in their gold PLA structure.
We really love the final result (and we can barely think of him trying not to get crazy while removing all the supports, considering it took a whole night until 6am)! Detailed, shiny, cute: they’re perfect to celebrate a graduation!
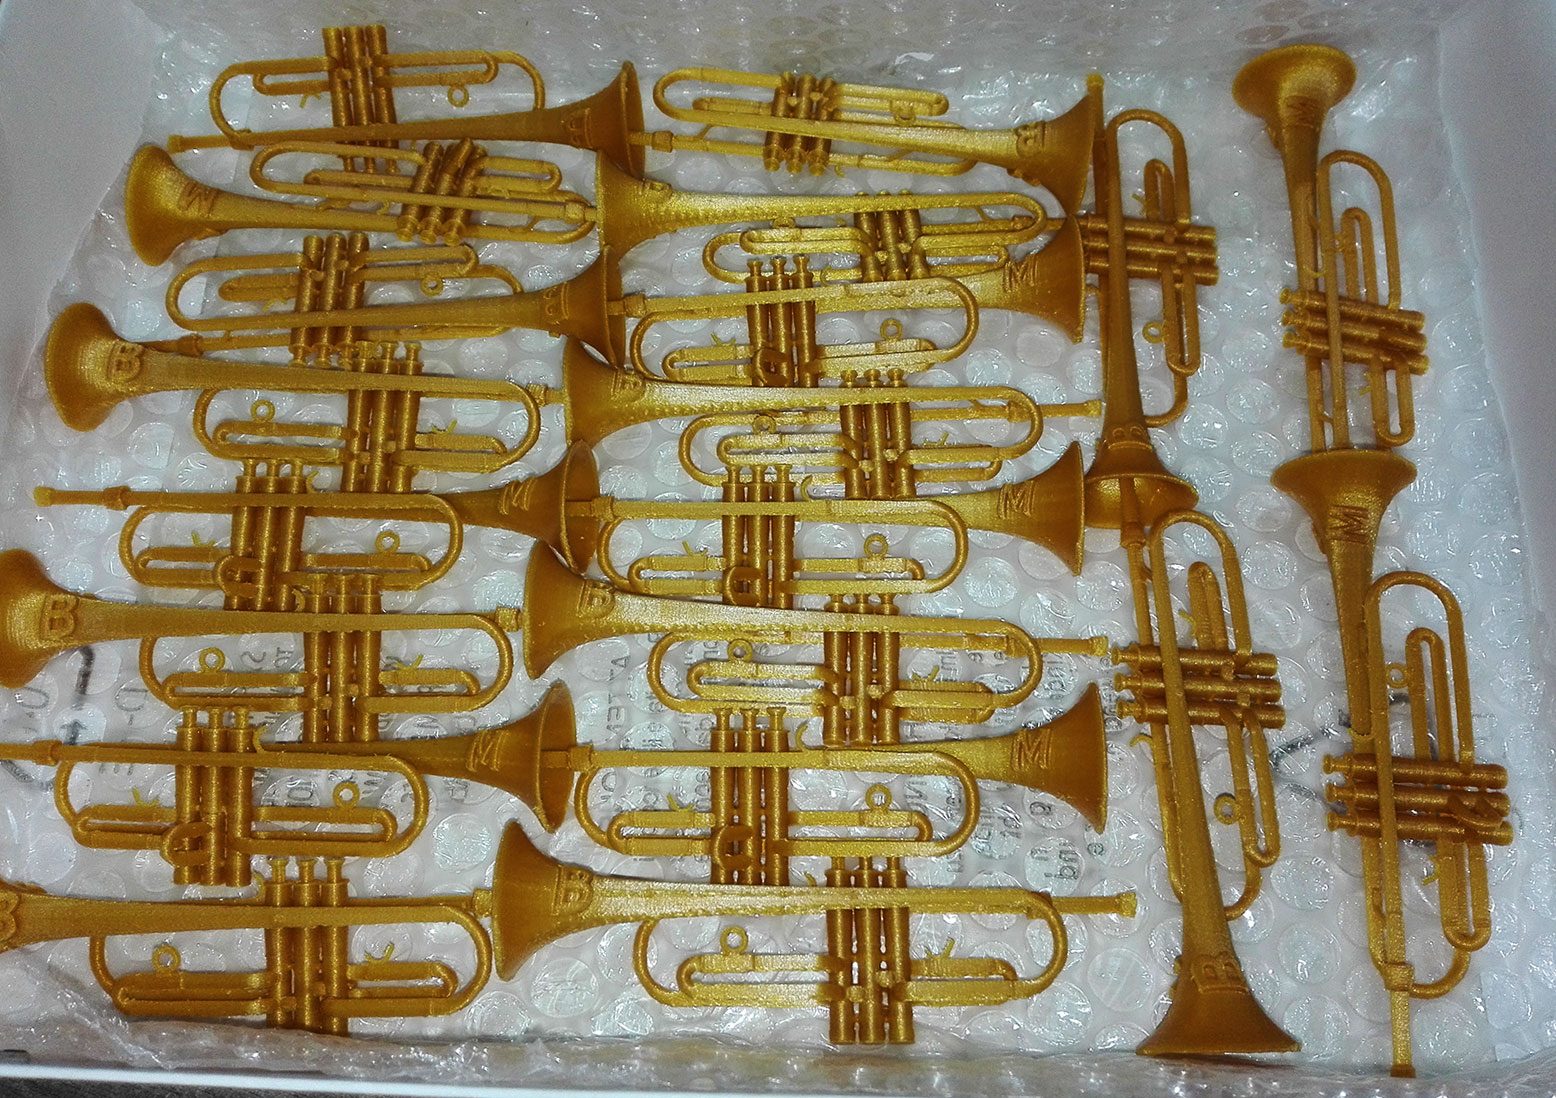
So, congratulation to the trumphet player but to Giovanni as well! He will soon have a Facebook page, we’ll share the link as soon as available.
If you want to contact him, tell us, we’ll do the trick for you.
That’s all for today,
keep following us!
FABtotum’s Community Highlights: multifunction tests from Japan
Hi all,
with today’s Community Highlight we would like to introduce you a very skilled Japanese guy: he got a very first FABtotum model and then updated it little by little during these years. He owns a full set of heads, included the recently released Laser Head.
Hkora11, that’s his nickname on the web, is a great skilled guy who knows how to take the most out of all the FABtotum’s functions. 3D printing, CNC milling and now Laser engraving!
That’s the aim of having a multitool, right?
So, what does he do? Many things. He owns a blog where he shows his tries but it is written in japanese. That’s why we’ll get you a complete set of ideas: he speaks a little english, so do not be afraid and contact him if you have anything you want to know!
3D printing shrenked
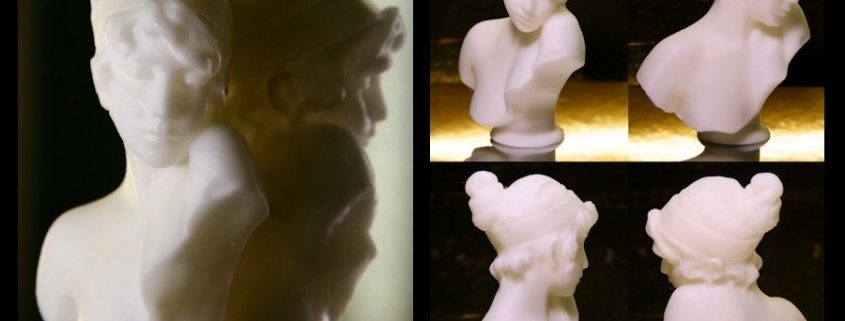
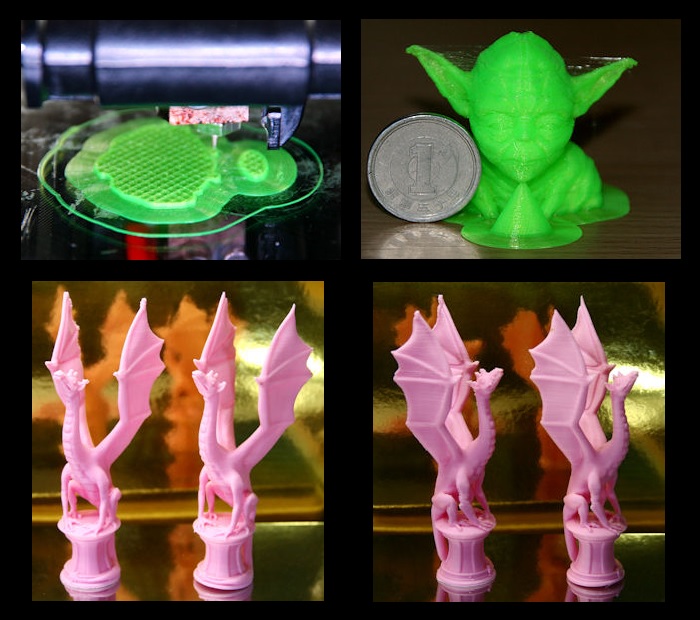
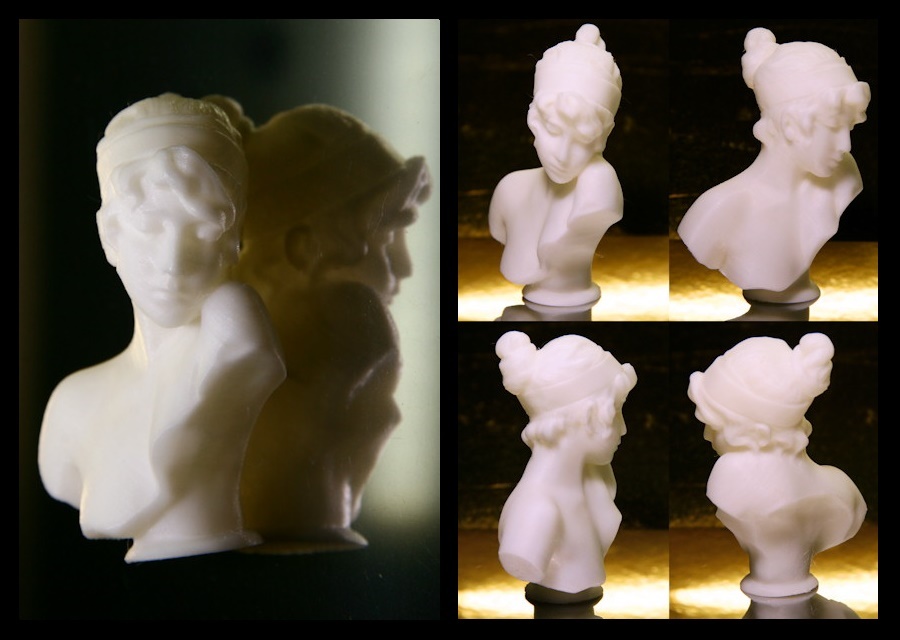
He started from the (probably) easiest of the FABtotum’s functions. Firstly, he used an Hybrid Head; then, he switched to a Printing Head V2. But! He needed to get small detailed figurines and he just worked hard in order to get the task completed. In his blog you can read dates are going back in the years. Among the most recent jobs there is the well finished bust here below. Printed with supports, Hkora11 replaced the nozzle with a custom made 0.2mm one. This small size allows him to reach a higher quality: the smaller the size, the greater the precision. Less material means thinner layers, which result in a smoother profile.
Milling 3D printer’s parts
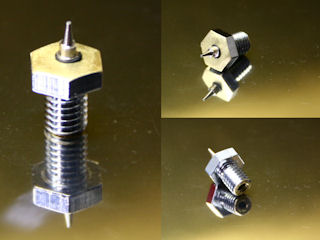
As he needed a smaller nozzle he just created it. Yes, really. After some tries he managed to mill aluminium with enough precision and he then used the result to 3D print. He started from softer materials in order to set the file properly and then got the metal version. With a FABtotum there’s no need to 3D print metal. You can carve it with a Milling Head! Read more about the evolution of his trials on his blog.
Lasering: still testing
Could he resist to the temptation? Nope. He was one of the first to rush to get his Laser Head!
Soon after he started trying and he is still. We’ll wait to see some more, but we already know he’ll get something interesting to be shared. He well calibrated as he got the grey scale correctly pictured and he is already playing with some pictures. Let’s see what he will do!
Hkora11 has very good skills and we’re happy to have him among our users. Want to write him and get tips? Do that! Better if you can speak a bit of japanese!
That’s all for this post: we’d rather have you to interact between you so don’t be shy and ask if you are interested in what he does. Of course, let us know what you create, as we believe in our great Community and want to see it growing.
Got something you want to share with us? Have questions? Write us!
Keep following us,
FABteam
FABTOTUM’s Contest #2: The COLIBRI effect
Dear all,
last week COLIBRI left the nest and made its first flight around.
It has flown in many houses and reports are coming back: and that’s what we want to hear from you. How is it going? How is it behaving? Are you already playing with it?

The COLIBRI effect contest
Have you ever heard of the Butterfly Effect? Well, we want to see the COLIBRI one!
The FABUI COLIBRI is still beta, meaning we still need some days to see how it goes and adjust it where needed. Luckily, FABtotum has a great community around the world that can try and follow endless different paths that would require the Team too much time to replicate.
Start playing with us: we started together a while ago, it’s time to get together again and make FABUI COLIBRI better!
How to? Simply report us as much as you can, we’ll make a list and a chart of the most influential, active users and reward them. A free spool to the top 5 among you!
How to enter:
Visit the link below and add logs. The Team will review all the comments and feedbacks. The Team will then make a chart of the most interesting logs. Number and quality will then be mixed to get the final winners.
https://github.com/FABtotum/fabui-colibri/issues
Times and places:
The contest will officially start on 27th of March at 6pm (GMT+1) and will last until 31st March at 12am (GMT+1) . Winners will be announced with a newsletter between 3rd April and 25th April as soon as the list has been reviewed and.
Any FABtotum owner can partecipate from any place in the world.
Previous logs and reports will be as well counted if the publisher will partecipate.
Prizes:
The top 5 active users will receive a free spool between the standard PLA/ABS ones depending on availability. Winners will be contacted privately via email to check the details within 72h from the newsletter confirming the names.
Read the full Terms&Conditions here
Ready, steady, go!
FABtotum
FABUI COLIBRI: the world first OS for 3Dprinting
FABUI COLIBRI is finally ready for its first steps in the world. From today, it’ll be available for dowload. After a first trial period, (the Beta test will last around 40 days) it will then pop up as update for everyone.
Want to try it immediately?
Join the revolution!

All the FABtotum’s owners have got used to what the FABUI has always been: a web interface that linked the machine and the human. A webpage with a dedicated IP address that could guide the multipurpose device to run all the tasks required.
Well, not exactly. Today, after three years of development, the FABteam is ready to introduce you the very first Operating System for 3D printing: FABUI COLIBRI.
A brand new multipurpose tool for a multupurpose device. The FABtotum CORE and FABUI COLIBRI are the perfect match.
Linux derived, will set a new start and a long path that is yet to be created.
FABUI COLIBRI is the result of a long process: feedbacks from the users of the FABUI and a hard work of tests converted in a complete different experience. COLIBRI is built from the ground up for 3D printing thanks to the Team and all the FABtotum’s owners, who will as well be able to update their devices and join the revolution.
What makes FABUI COLIBRI so great?
It’s light, it’s fast, it’s stable. Just like the small animal FABtotum took the name from (colibri is the italian word for hummingbird; some species are called with the same word in english as well), the world’s first Operating System for 3D printing is studied to never leave the user and get him/her a best-ever experience.
Light: it only weights around 150mb and it has everything needed to start working. The file can easily be written on a micro SD (or standard SDs for “older” users) to switch from the FABUI to COLIBRI. Of course, it will be built-in on any new device and it is retro-compatible with all the existing units.
Fast: the first boot takes around 120 seconds, then only around 15 seconds for the next times. The white lights will tell to the user that everything is ready, just as usual. But faster. The FABtotum will be accessible to a standard IP address via Ethernet cable and can be as well connected via Wifi. With both solutions, the webpage will respond immediately to every command, from moving the axis or managing temperatures to uploading the files.
Stable: every Operating System has a recovery method and COLIBRI is developed to never fail. No more loss of files, no more troubles. The first ever OS for 3D printing is able to reboot in a click and fix itself so that the user is never left alone with a crashed system. The FABUI COLIBRI is meant to work continuously. It will as well always automatically update in the background (as long as the device is correctly connected to the net).
Not enough? It also comes with brand new algorithms which will better manage every print; it introduces pauses while printing, it adds a performing virtual visualisation, it has a 3D scanning function performing better than ever. Last but not least, any user will be able to update but also to downgrade both software and firmware should they need to (for instance if they develop a different interface they will always be able to use it no matter what direction FABtotum takes).
A simple and user friendly look
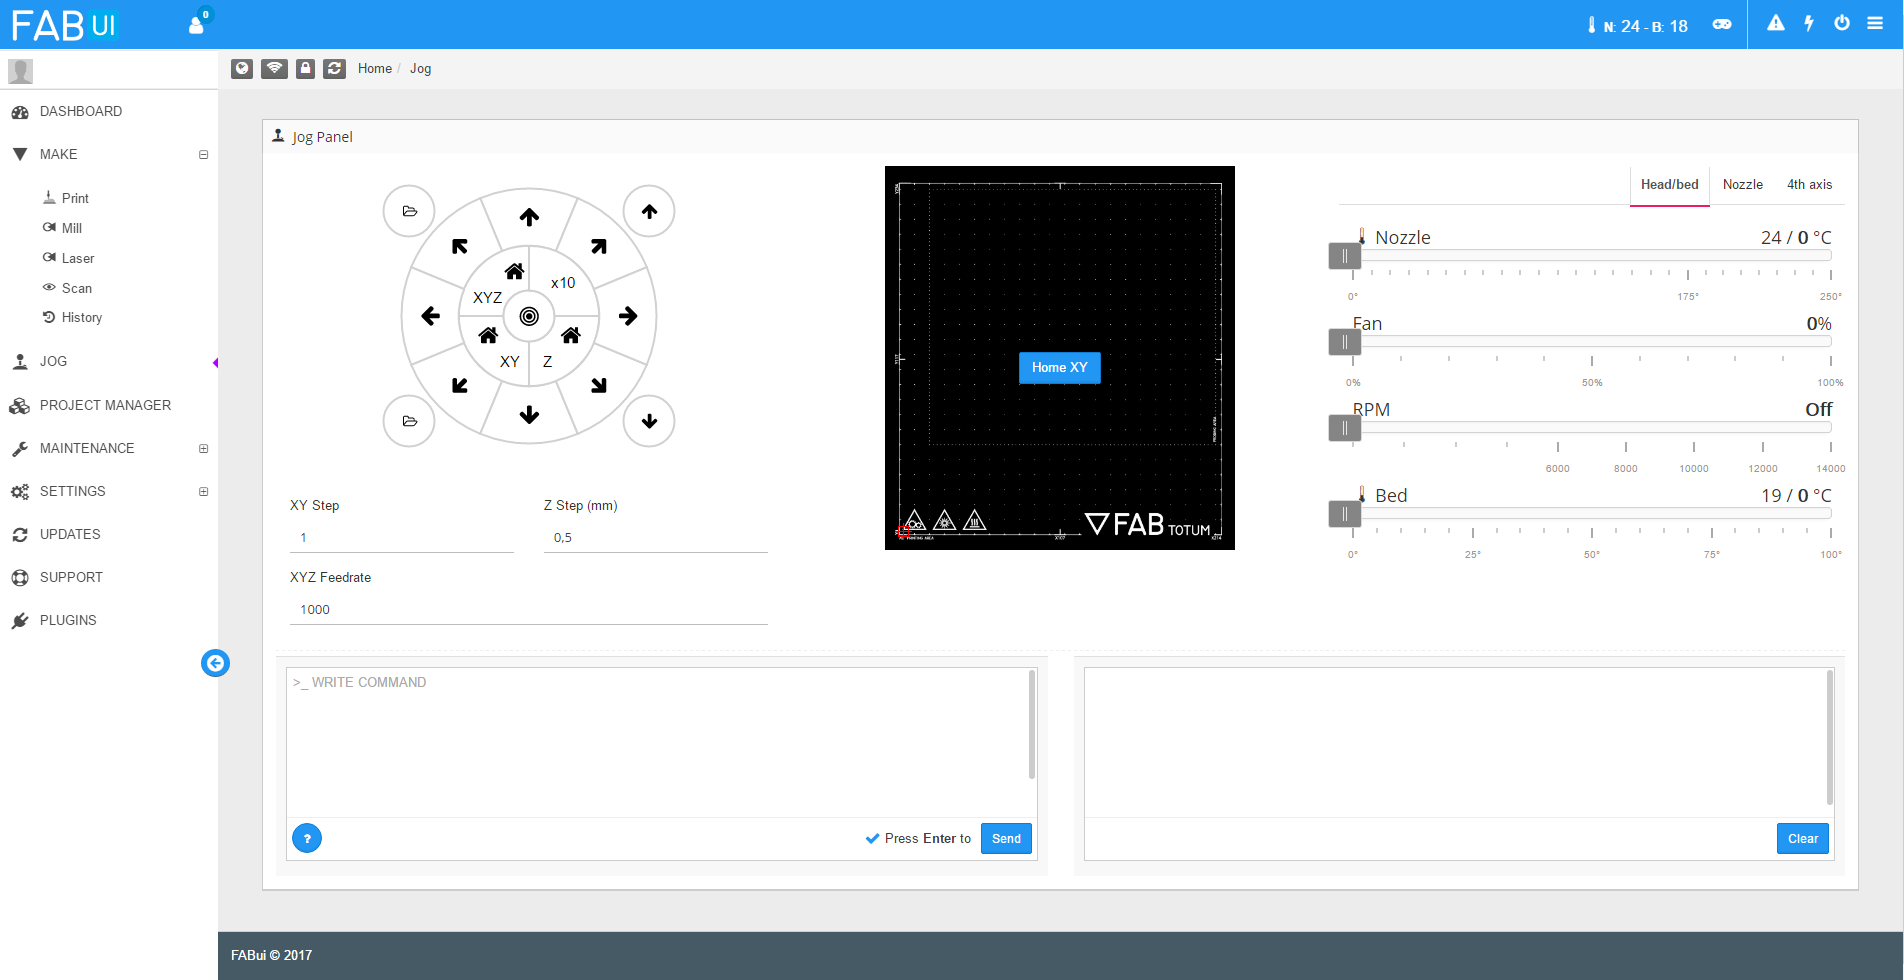
The FABUI COLIBRI just looks easy to be used. Main features and threads are clearly listed on the left menu. FABtotum’s owners will recognize the same structure laying behind the revisited one. The new skin is clearer and gets the focus on the most important threads.
Dashboard: the place where all the news are shared via our blog and social accounts. Community craetions are as well shown here.
Make: that’s how the tool and function is chosen. That’s where all the projects become live.
Jog: useful both to check the behaviour of the printer and for any special task.
Maintenance: here is where the user should go when it’s time to clean up, and/or to set the right filament.
Settings: need to fine tune your FABtotum? No problem, everything can be checked and calibrated. From the net to the Hybrid Bed.
These are only the main areas of the menu of course. Along with a more friendly interface, there’s another big change: the FABUI COLIBRI features three languages. English, italian, german. What about the others? Ask the community: having a big group of users around the world means that if FABtotum does not make it, someone else can. The Team will then review it and get it available for everyone.
A free spirit
The FABtotum remains an open-source for the greatest of its parts. FABUI COLIBRI has a dedicated area for the custom heads and plug-ins. Since the beginning of the company’s life, community creations have always been welcomed. With the introduction of the Head Development Kit the Team offered a new support hardware side. FABUI COLIBRI adds the chance to easily feature any DIY tool. The users who can develop additional parts will just need to set everything up and get the most out of their creation(s). FABUI COLIBRI adds a simplified tool that will open up to a preset list of plugins, such as the one for the Laser Head recently released, but as well leave space for ideas and suggestions from the world.
Just as for the languages, there are still many sides of the platform that can be enhanced and the Team is more than happy to receive feedbacks from the community.
3, 2, 1, GO!
The FABUI COLIBRI, also known as FABUI 1.0, is ready to be downloaded and tried. After a first round of feedbacks, it will then pop up as update for everyone. As said, it is a major change but will still work on every existing unit.
The FABtotum is a multipurpose device and FABUI COLIBRI is of course intended to work only with it. Every function available today – 3D printing, CNC milling, 3D scanning and Laser engraving – will benefit of improvements.
How to install it on your FABtotum:
FABUI COLIBRI is the first Operating System in the world completely developed for 3D printing. Completely developed by the FABteam, it will make everything fast and simple.
Here below you’ll find the steps to follow to install it on the FABtotum: compatible with every unit, it is built-in for new devices (starting from March 2017).
1. Download the latest image available:
http://update.fabtotum.com/colibri/armhf/images/sdcard_latest.zip
The file will be automatically saved on your computer as a zipped folder. Should your computer not recognize it, give it a try anyway.
2. Format an SD card (any kind/size will do):
make sure to use a FAT32 File System and label it as “Boot”.
3. Unzip the file you downloaded at step 1 making sure that:
a) the destination you select is the formatted SD;
b) no folder is created. The content of the .zip should be pasted directly in the main directory;
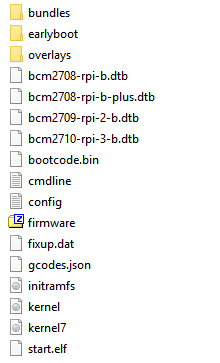
c) once done, you should see three folders (“bundles”, “earlyboot” and “overlays”) plus a series of files;
d) once done, you should see that the files just weight around 150mb.
4. Insert the SD into the slot of the FABtotum:
a) when you do this, of course, the unit must be turned off;
b) if it’s the first time you open the electronic panel, make sure to firstly take the screw off from the bottom right. The remaining three points are magnets. This is valid for unit delivered until Jan 2017. Newer units will have screws on all the 4 points.
5. Connect to your FABtotum via Ethernet cable just as you did on the very first time.
6. Turn on your FABtotum:
you should hear a couple of “beeps” and lights will start blinking. They should stop in a minute more or less. If this does not happen, files might not be correctly copied on the SD. First, try to repeat operations. If this still does not solve, contact us via ticket system.
7. Get the blue lights:
when FABUI COLIBRI is ready to start its booting, leds will turn to a stable, electric blue.
8. Open your preferred browser and go to page 169.254.1.2:
a) first boot will take up to 1 minute: you’ll just need to follow the instructions on the screen and wait for all the files to correctly upload.
b) second setup will need you to fill in your details: register again with your email and password. Please avoid using the autofill provided by some browsers at this step. All the lines must be filled and have a white background;
c) make sure to use a valid email;
d) as for the languages, feel free to select your preferred one. Some pages are still available only in english for the very first release. Updates will later translate everything.
9. Follow the wizard:
FABUI COLIBRI will guide you step-by-step through the next steps. Make sure as well to recalibrate your FABtotum, reconnect to the net and simply run all the tasks just as you did when you received the unit.
Nice, now that COLIBRI is on your FABtotum, feel free to share with us your feedbacks and advices. But! Please use the below link so that the messages go straight to the Dev Team.
No ticket needed, no forum post, just here:
https://github.com/FABtotum/fabui-colibri/issues
We once again thank every person who helped us, even just using his/hers FABtotum.
Keep following us,
FABteam
FABtotum’s Community Highlights: a framed woodplate for your beloved one
Hi all,
today is Valentine’s Day! But: we all know that we should show our love everyday. Still, today we are so keen on spoiling our beloved ones that we could not resist as well: that’s why for this Community post we decided to introduce you Chema Alfaya; he lives in Spain and has a brand new FABtotum CORE, with all the tools. That’s why he could do what he did.
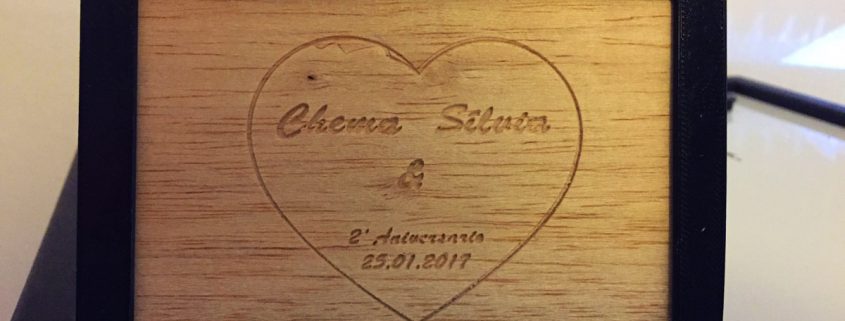
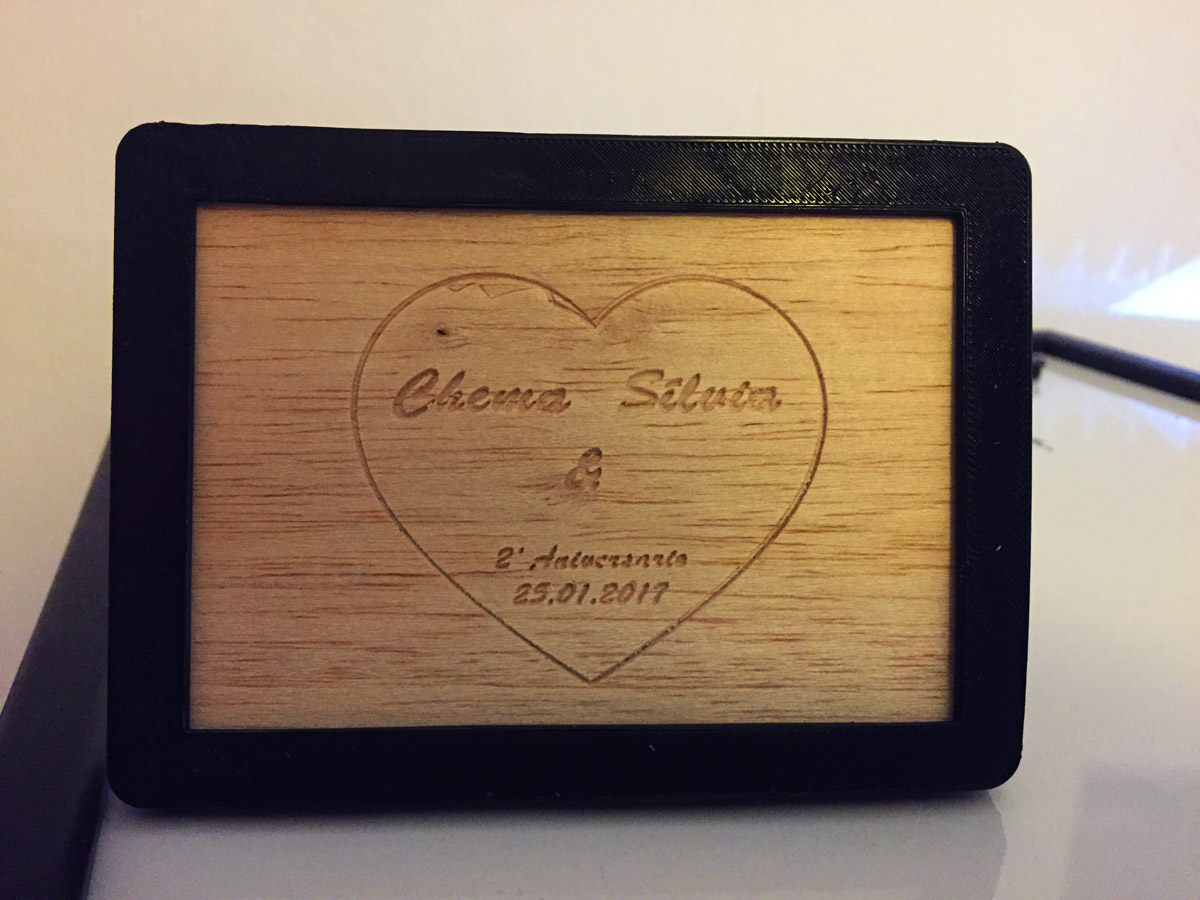
Chema wanted to get a present created for his second anniversary and could not resist but making one. He therefore realized a woodplate that he then put in a ABS 3D printed frame. A lot of work but he’s smart and he followed a very intelligent path to proceed. Also, he followed Alessio Cavalieri’s tips found on our previous post: that’s great to see how you learn from other users!
Designing the idea
He got nothing to start from but his willing to get the present customized. He therefore used Adobe Illustrator to draw the heart and the text: the vector image was then translated into a GCODE thanks to makercam, the online tool. In fifteen minutes he had the design ready to be engraved.
He also needed to get the frame outfitted: he actually completed the milling part first, so that he could get the right proportion. In around an hour everything was ready. This time, he used SketchUp.
Making it real
We all live in a digital era but the FABtotum is still working on getting your projects to materialize.
Chema needed to start from the engraving task as he needed to center the heart and the text. To get this done, he had to sand some material from the original piece of wood.
The letters needed a lot of precision, so he chose a V carve milling bit. When this kind of tool is used, the Milling Head should spin quite low as the bit itself is very fragile.
The woodplate was realized in a 2 hours task, with 0.1 increments on the Z-axis for a total of 10 passes. Again, speed was kept low to have a higher precision and avoid damages on the bit.
Tip: if you do not have a V-bit that can carve with such high details, you might need to resize everything so that the text still looks fine. As a reference, Chema used a 115x80x2 mm wood piece.
Once he knew the exact dimension of the plate, he could print the frame for a perfect fit. This task took three hours and it was realized with a FABtotum’s Carbon black ABS spool. Want to know the profile and the precise settings? Write him!
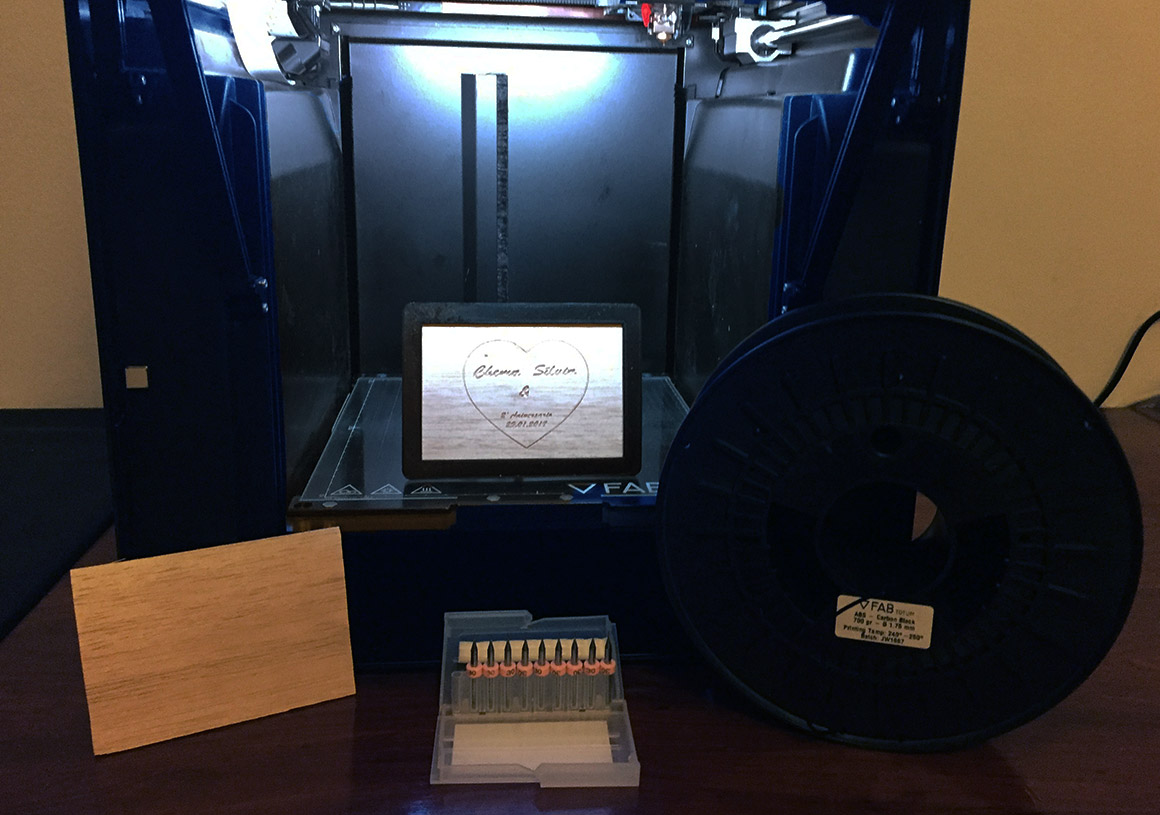
And…that’s it! The final look is just a great idea for a customized gift and today sounds even better. It just takes hours, so it’s a doable thing if you’re in a hurry! If you have a Laser Head, also, you can engrave the wood and get a whole picture or a more detailed jpeg reproduced.
So, that’s all for this Community Highlight and remember: it’s the thought that counts.
But if it is customized it’s better.
Got something you want to share with us? Have questions? Write us!
Want to ask Chema something? Write him!
We would like to thank Chema once again, keep following us!
FABteam
FABtotum’s community highlights: 3Dprinting a moving carousel
Dear all,
these days have seen the Laser Head coming out on the store and quickly disappear again as you got them all in an hour or so. While we thank you once again for your overwhelming welcome, we still love the idea that with the FABtotum you can Make More.
Today with a new Community post, we’d love to introduce you Sinan, aka kralmarks on Instagram. He knows how small things can become great ones. He lives in Istanbul, Turkey, and he is quite new among us: his one is a FABtotum CORE and he’s been using it quite intensively. The project we’ll write you about is the first one he shares with us: we are sure we’ll read from him again anyway!
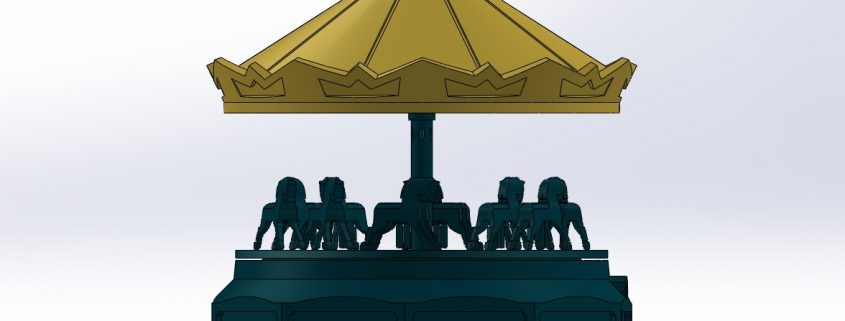
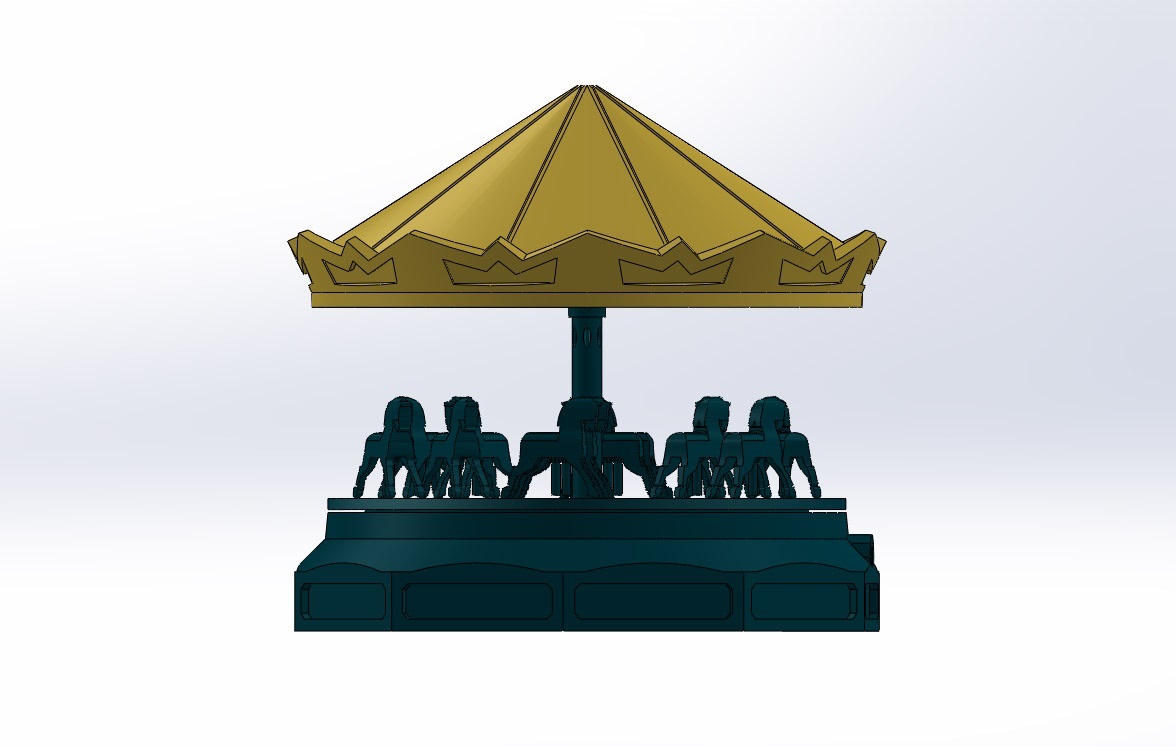
Sinan needed a great gift idea: 3D printing helped him and got him a solution: he therefore started designing a fully working carousel. It spins! It took a while to get the whole thing done but surely it will be appreciated. So, let’s see what he did.
From nothing to digital
Sinan designed himself all the parts with the help of one of the most common 3D designing software. It took over a week to have all the components ready and as far as we know he could even add more timing to the final count as he still thought something was missing. The number of parts is about 50: many of them are unique pieces while smaller ones might be reprinted more than once.
He then had to make all the gcodes done. Until here, we’re still digital. Let’s see how he got his idea to real.
From digital to real
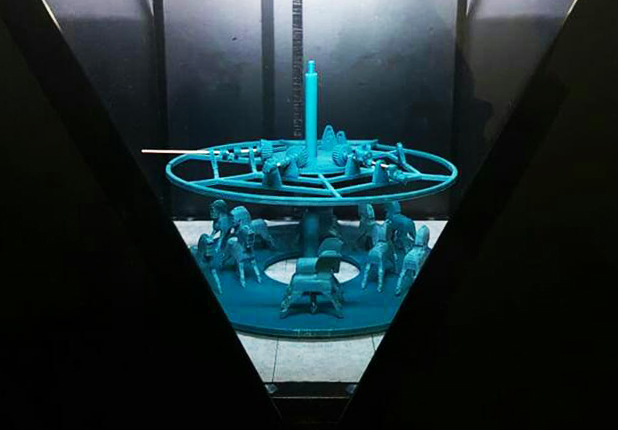
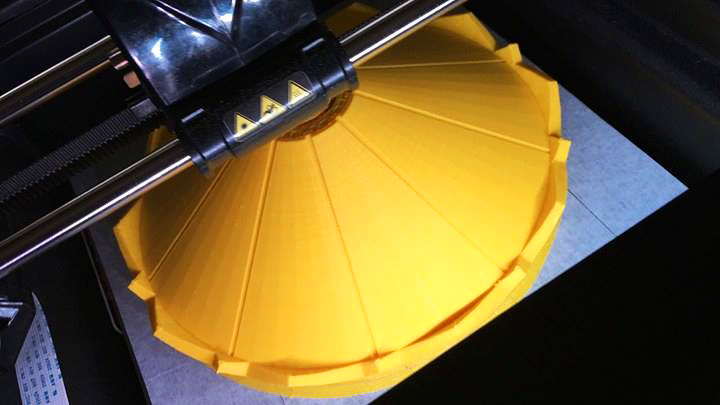
Once all the gcodes were correctly uploaded on the FABUI, the FABtotum User Interface you all should know quite good, he could start the 3D printing process. He used a light blue PLA filament for everything except the top. Could he change the colour at a random point to get a multicolor 3D printing? Maybe, ask him! He did not tell us why he picked this colour but we find the project itself is still so goodlooking that we did not even think of asking more. Also, the yellow top adds the missing contrast so we still love how it looks.
The total timing for 3D printing all of the small parts? 75 hours. Yep, the FABtotum has been printing for around three days. Stressing but nothing went wrong!
From pieces to final goal
The final step has been the toughest one: assembling all the small parts. Once he had everything on the table he then got the help of toothpicks and glue. He of course had a very clear view of the final look as he had to stick them so that they could still be free to move and spin.
You may want to know how long it took to have everything done: 20 hours. To be added to the previous ones of course.
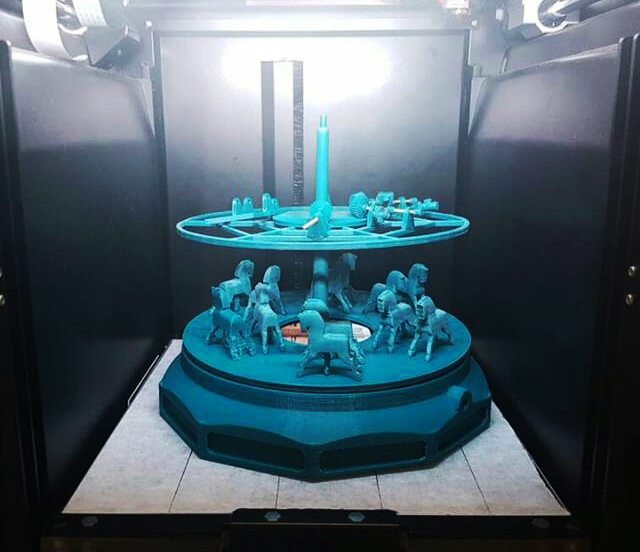
So, it took a while but the gift is ready: surely the person who this project is for will appreciate both the idea and the efforts behind it. And you? Did you like it? Want to get one as well? Contact Sinan to know more!
Got a design you want us to write about? Contact us.
That’s all for this Community Highlight, thanks to Sinan, keep sharing!
Keep following us,
FABteam
Calibrating the Laser Head focus distance
/0 Comments/by MarcoFABtotum releases the Laser Head
We have come to a final version of the much-awaited Laser Head, the addon which will make the world’s first Personal Fabricator even more multifunctional. The new module will add laser engraving and laser cutting on top of the 3D printing, 3D scanning and 3D milling functions.
Easy, fast, useful
The FABtotum Laser Head just needs to be plugged onto the 3D printer’s carriage: that’s how anyone will get a laser engraver and cutter on his/her desktop. With a power of (almost) 500mW, it can engrave many materials such cardboard, wood, balsa and many more. It can even cut thin layers, mainly paper. And it can make PCBs. Oh yes.
The Laser Head will be available for purchase from today directly on FABtotum’s store and it will work on every unit ever delivered. As always, the aim is to have a machine which can constantly be updated, enlarging its potential and/or making the main hardware performing better than ever.
The software included will just make things easier: having a draw transported on the choosen material will be possible in a few clicks.
Precision is the word
A laser beam can draw with incredibly high precision. The cartesian axis of the FABtotum Personal Fabricator are perfect to drive the Head on the surface: the FABtotum’s software will automatically move the tool on the X and Y. This new technology will exponentially open up to different works ideas and projects. Even a simple jpeg photo can become real and reproduced on a real surface. The result will just surprise.
What will be the main uses of the new FABtotum addon?
The Laser Head in conjunction with the Milling Head will expand the possibilities as they’re meant to cooperate: their potentials are completely different. While the second can cut off and carve deeply any material, included woods and thin metals, the Laser Head will work better for different tasks. Here are a few examples:
1. Wood/balsa engraving: the 500mW beam is enough to mark those surfaces and with the possibilities to choose between none and 255 (but, honestly 10 are more than enough!) shades of greys it will be possible to reproduce with precision all the pictures and photos. Also, it’ll be possible to choose from different profiles to decide which final look is preferred. Of course, FABtotum’s Software will be needed in this case.
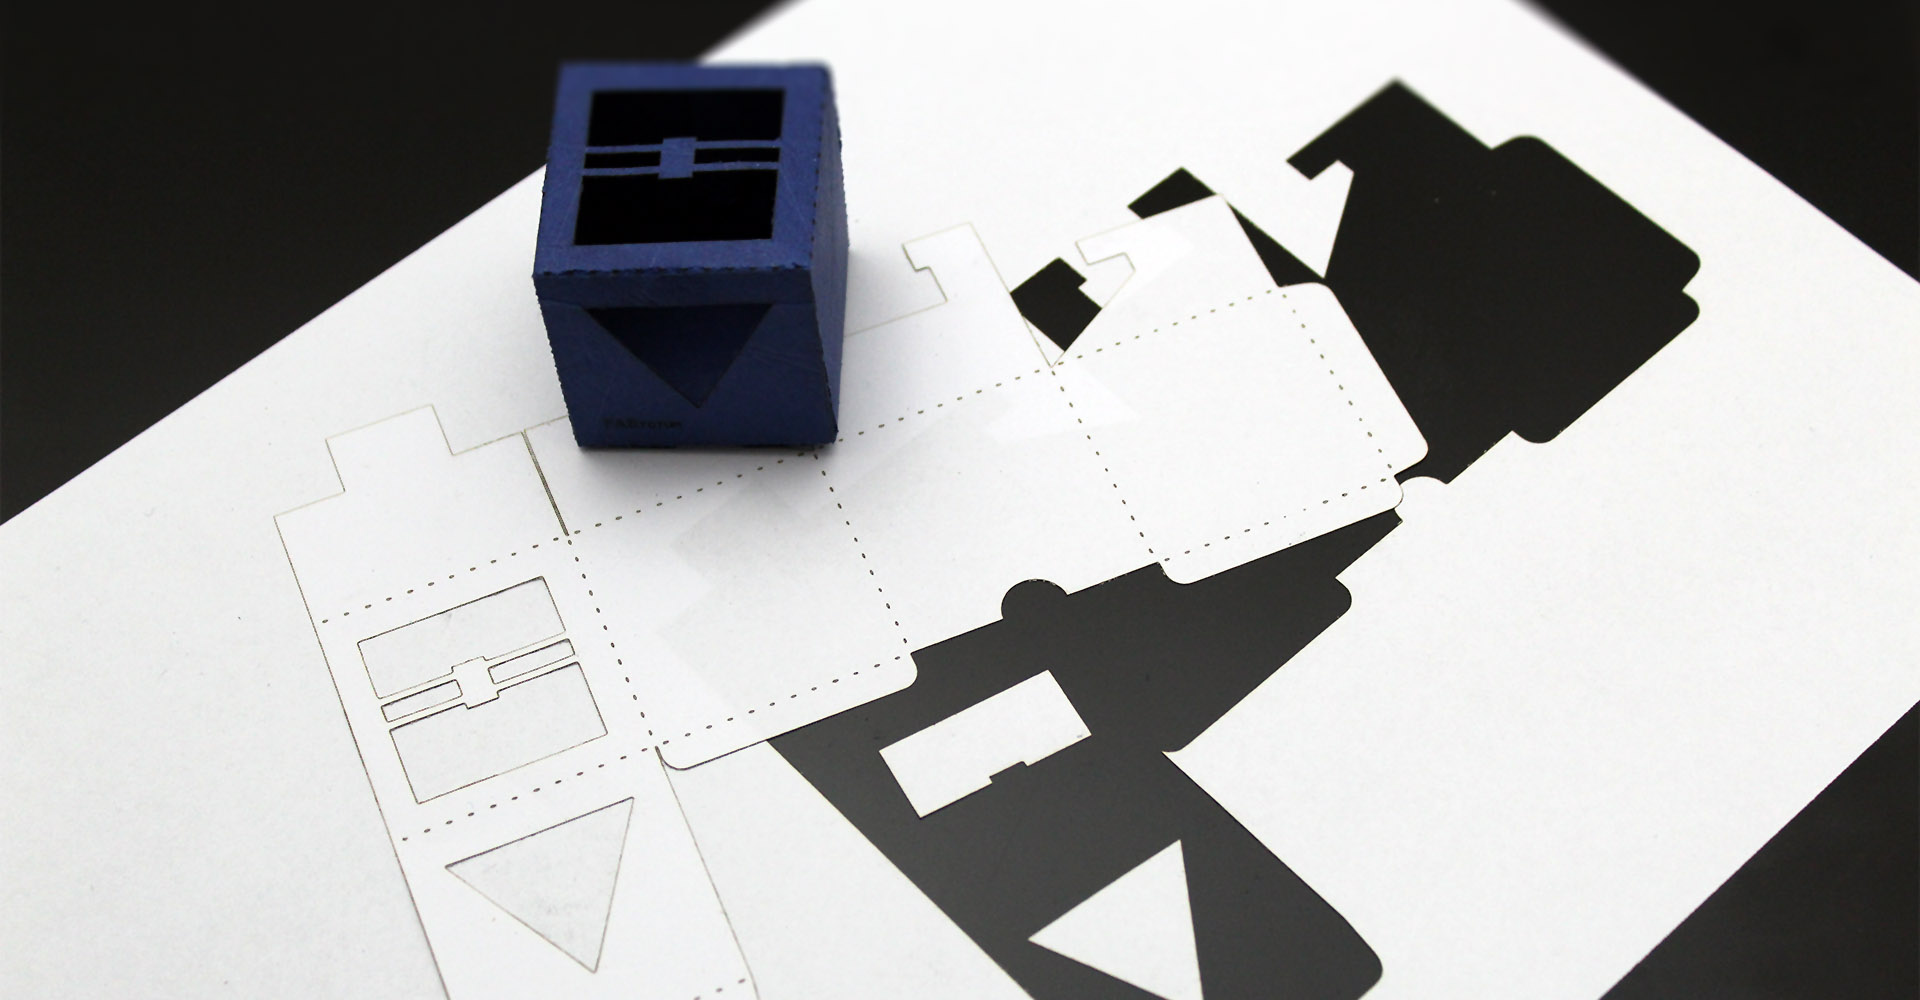
2. Paper/cardboard cutting: with the FABtotum Personal Fabricator and the Laser Head addon is easy to create many artcrafts such as foldable or pop-ups models, origamis and so on. The light beam is strong enough to both make the surface easier to be bent or to cut it in one step. With the help of FABtotum’s dedicated sofware, also, everything will be even easier thanks to the preset profiles.
3. PCBs: that’s the big deal. While the Milling Head could be used as well, there’s nothing as precise as a laser. The strong brushless motor, anyway, will still be a valid alternative and will also help to cut out the board in the desidered dimension. The Laser Head will work for both positive and negative photosensitive PCBs. In the positive ones the beam will polimerize the layer that should not be eroded by the acid. When a negative board is chosen, the beam wil then be directed on the parts taht should be eroded by acid.
This method of creating PCBs is costs and time saving. Easy, cheap and fast, is the best solution for both makers and any business that needs many prototypes.
A dedicated software
The Laser Head will benefit of a user friendly software* completely developed by the FABteam: the pre-set profiles, the ease to upload a picture and get a GCODE done will make the user able to create in a few minutes. Whether the project is a PCB or a kirigami, the FABtotum’s software will set everything up. Of course, skilled makers will still have the chance of changing some settings or even use a different method to generate the GCODE.
The Laser Head is the perfect tool for anyone: from makers to artists, from small business to schools and education centres. The classB laser has enough power to make a lot but it can still be considered safe when properly used. Available as an addon to be purchased alone and/or bundled with the FABtotum CORE.
The FABtotum CORE
FABTOTUM srl has been funded by Marco Rizzuto and Giovanni Grieco in late 2012 in Milan, Italy, where it is still based today. A year later the first model of the FABtotum Personal Fabricator has been described like the most innovative machine on the market; at the same time it become the most successfull crowdfunded product of all Europe.
The first FABtotum has been delivered in 65 countries and it counts more than a thousand units delivered.
The FABtotum has been the first to offer a multipurpose machine and to understand the important of having a device that could update itself endless times and get a mini laboratory on a desktop.
In the 2016’s Q4 the FABtotum CORE edition was officially presented during the company’s first Milestone. Between the advantages of this new model, there are a renewed Printing Head and Milling Head, a Hybrid Bed V2 and a complete new set of electronic boards. While the outside might look similar, the inside is completely revisited.
What else apart from Heads and Bed? We now have a Totumduino V2, a Raspi3 set and a Flex V2.
Want to upgrade? Contact us.
Once again, we’re happy to share with you what we’ve done so far, surely you’ll love it!
*The software will be free until June 2017.
Search FABtotum
Sign up to our newsletter
© Copyright - FABtotum 2017-2018
FABtotum ™ S.R.L. In Liquidazione . ALL Rights Reserved.
Legal Office
Via Solferino, 1, Lodi – 26900 (Italy)
Operational Headquarters
Via Paullo 3/a, Tribiano – 20067 – Milan (Italy)
VAT / P.IVA: 08446190962 | REA LO - 1475185 | Capital Stock: 23.752 €
Privacy Policy

